What is the best way to water my Banana shrub?
Your Banana shrub will not be too picky about how you choose to water it. As such, you can use just about any common watering tool to moisten this plant’s soil. Watering cans, hoses, and even cups will work just fine when it is time to water your Banana shrub. Regardless of which watering tool you use, you should typically apply the water directly to the soil. In doing so, you should ensure that you moisten all soil areas equally to give all parts of the root system the water it needs. It can help to use filtered water, as tap water can contain particles that are harmful to plants. It is also beneficial to use water that is at or slightly above room temperature, as colder or hotter water can be somewhat shocking to the Banana shrub. However, the Banana shrub usually responds well to any kind of water you give it.
![more]()
What should I do if I water my Banana shrub too much or too little?
For outdoor plants, especially newly planted plants or plant seedlings, they can be prone to lack of watering. Remember that you need to keep watering enough for a few months when the tree is small or just planted. This is because once the roots are established, Banana shrub can rely on rain most of the time. When your Banana shrub is planted in pots, overwatering is often more likely to.When you accidentally overwater your Banana shrub, you should be prepared to remedy the situation immediately. First, you should stop watering your plant right away to minimize the effect of your overwatering. After, you should consider removing your Banana shrub from its pot to inspect its roots. If you find that none of the roots have developed root rot, it may be permissible to return your plant to its container. If you do discover signs of root rot, then you should trim away any roots that have been affected. You may also want to apply a fungicide to prevent further damage. Lastly, you should repot your Banana shrub in soil that is well-draining. In the case of an underwatered Banana shrub, simply water this plant more frequently. Underwatering is often an easy fix. If you underwater, the plant's leaves will tend to droop and dry out and fall off, and the leaves will quickly return to fullness after sufficient watering. Please correct your watering frequency as soon as underwatering occurs.
![more]()
How often should I water my Banana shrub?
Most plants that grow naturally outdoors can be allowed to grow normally with rainfall. If your area lacks rainfall, consider giving your plants adequate watering every 2 weeks during the spring and fall. More frequent watering is needed in summer. In winter, when growth becomes slower and plants need less water, water more sparingly. Throughout the winter, you may not give it additional watering at all. If your Banana shrub is young or newly planted, then you should water more frequently to help it establish, and mature and grow up to have more adaptable and drought tolerant plants. For potted plants, there are two main ways that you can determine how often to water your Banana shrub. The first way is to set a predetermined watering schedule. If you choose this route, you should plan to water this plant about once every week or once every other week. However, this approach may not always work as it does not consider the unique conditions of the growing environment for your Banana shrub . Your watering frequency can also change depending on the season. For instance, a predetermined watering schedule will likely not suffice during summer when this plant's water needs are highest. An alternative route is to set your watering frequency based on soil moisture. Typically, it is best to wait until the first two to four inches of soil, usually ⅓ to ½ depth of the pots, have dried out entirely before you give more water.
![more]()
How much water does my Banana shrub need?
When it comes time to water your Banana shrub, you may be surprised to find that this plant does not always need a high volume of water. Instead, if only a few inches of soil have dried since your last watering, you can support healthy growth in the Banana shrub by giving it about five to ten ounces of water every time you water. You can also decide your water volume based on soil moisture. As mentioned above, you should note how many inches of soil have dried out between waterings. A surefire way to make sure your Banana shrub gets the moisture it needs is to supply enough water to moisten all the soil layers that became dry since the last time you watered. If more than half of the soil has become dry, you should consider giving more water than usual. In those cases, continue adding water until you see excess water draining from your pot’s drainage holes. If your Banana shrub is planted in an area that gets plenty of rain outdoors, it may not need additional watering. When the Banana shrub is young or just getting established, make sure it gets 1-2 inches of rain per week. As it continues to grow and establish, it can survive entirely on rainwater and only when the weather is hot and there is no rainfall at all for 2-3 weeks, then consider giving your Banana shrub a full watering to prevent them from suffering stress.
![more]()
How can I tell if i'm watering my Banana shrub enough?
Overwatering is a far more common problem for the Banana shrub, and there are several signs you should look for when this occurs. Generally, an overwatered Banana shrub will have yellowing leaves and may even drop some leaves. Also, overwatering can cause the overall structure of your plant to shrivel and may also promote root rot. On the other hand, an underwatered Banana shrub will also begin to wilt. It may also display leaves that are brown or brittle to the touch. Whether you see signs of overwatering or underwatering, you should be prepared to intervene and restore the health of your Banana shrub.
![more]()
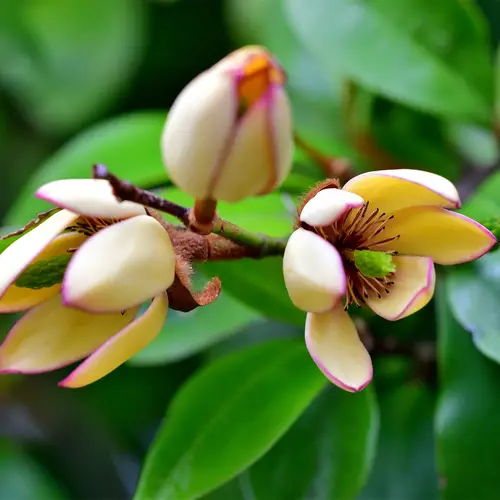
How can I water my Banana shrub at different growth stages?
When the Banana shrub is very young, such as when it is in a seedling stage, you will need to give it more water than you would if it were at a mature age. During the early stages of this plant’s life, it is important to keep the soil consistently moist to encourage root development. The same is true for any Banana shrub that you have transplanted to a new growing location. Also, the Banana shrub can develop showy flowers and fruits when you give them the correct care. If your Banana shrub is in a flowering or fruiting phase, you will likely need to give a bit more water than you usually would to support these plant structures.
![more]()
How can I water my Banana shrub through the seasons?
The seasonal changes will affect how often you water your Banana shrub. Mainly, during the hottest summer months, you will likely need to increase how much you water this plant, especially if it grows in an area that receives ample sunlight. Strong summer sunlight can cause soil to dry out much faster than usual, meaning that you’ll need to water more frequently. By contrast, your Banana shrub will need much less water during the winter, as it will not be in an active growing phase. During winter, you can get by with watering once every 2 to 3 weeks or sometimes not at all. For those growing this plant indoors, you should be somewhat wary of appliances such as air conditioners, which can cause your plant to dry out more quickly, which also calls for more frequent watering.
![more]()
What's the difference between watering my Banana shrub indoors vs outdoors?
In some cases, your Banana shrub may not need any supplemental watering when it grows outside and will survive on rainwater alone. However, if you live in an area of little to no rain, you should water this plant about every two weeks. If you belong to the group of people who live out of this plant's natural hardiness zone, you should grow it indoors. In an indoor setting, you should monitor your plant's soil as it can dry out more quickly when it is in a container or when it is exposed to HVAC units such as air conditioners. Those drying factors will lead you to water this plant a bit more often than if you grew it outdoors.
![more]()
Do I need to prune my Banana shrub?
Banana shrub, like most other evergreen trees, absolutely need to be pruned in order for them to grow as happy, healthy trees. Of course, there are lots of reasons that pruning is important, so we’ll talk about those in greater detail. Pruning opens up the inner canopy to airflow and sunlight. Without keeping these pathways open, the inner canopy will be starved of sunlight and air. Therefore, pruning your Banana shrub is not only advantageous, but it also weakens the impact of pests and infections by separating branches from one another. These benefits are far too easy to reap with Banana shrub to neglect them. Aside from keeping your Banana shrub happier and healthier, pruning just makes things look nice and tidy. Who doesn’t love a well-kept tree, anyway?
![more]()
When is the best time to prune my Banana shrub?
Banana shrub can be pruned at different times depending on whether they’re grown indoors or outdoors. For outdoor trees, pruning and trimming should be done when the tree is not actively growing; this generally falls under the colder months of winter, but can vary depending on where you live. However, if you’re growing your Banana shrub indoors, there are lots of different times of the year when it’s okay to trim lightly. For example, if you’re planning on trimming a bit off the top of just one or two smaller branches, then you can trim nearly anytime. For heavier pruning on indoor Banana shrub, it’s best to wait until those same colder months when outdoor Banana shrub wouldn’t normally be actively growing. Banana shrub should be pruned as needed. Typically, these trees should be pruned to remove any damaged, yellowing, dying, or dead foliage. It is also necessary to prune this plant to remove any shoots that are congested or are crossing.
![more]()
What should I do after pruning my Banana shrub?
In order to keep your Banana shrub growing strong, remove any branches or debris that landed at the base of the tree. Keeping the area clear can prevent weeds and underbrush from crowding out the tree, especially if it’s young. Another great tip is to use raw, organic honey to treat large open wounds on the Banana shrub where branches were trimmed. The use of honey prevents any pathogens or potential pests from making their way in. It’s also a good idea to water a little extra after pruning for a week or two. Providing them with a little extra water helps them build natural calluses over the exposed core faster, so they can get back to growing into large, Banana shrub!
![more]()
How can I prune my Banana shrub: tips and techniques?
While most of the Banana shrub won’t need to be pruned until they develop some substantial height, sometimes their branches get a little carried away in the wrong direction. This is why this part of the Banana shrub needs to be pruned in good time. Tools In order to prune your Banana shrub properly, you’ll need the proper pruning tools. While smaller plant shears and garden scissors may not cut it (pun intended), handheld clippers, pruners and loppers will certainly help out. For very tall branches that are out of safe reach, use a pole saw with the necessary safety equipment. It’s also a good idea to wear gloves while pruning to avoid any splinters or cuts in general. How to Prune To prune your Banana shrub, first cut away any dead, dying or diseased branches. Look for pests, irregular growth patterns, and brittle branches or leaves. Snip these off at the branch collar, where the branch intersection is, without scoring the main branch. Next, be on the lookout for extra long branches or leaves that may not be able to support a lot of weight. These branches or leaves will be too heavy and grow downwards, so this can be trimmed back if necessary. Try to find all of the branches that grow either directly up (that are not the primary trunk) and those that grow directly downward. These branches will become an issue because they can effectively block out light and air from inner branches. Trim these back to the branches they stem from as well. If there’s not much space within the canopy for light to reach the center of the tree, you can trim away some excess foliage to make windows for light to shine in.
![more]()
How much/long should Banana shrub get sunlight per day for healthy growth?
For healthy growth, make sure that Banana shrub receives at least 3–6 hours of sun each day. This is actually a minimum requirement—most plants that can handle part sun can also thrive in full sun, but because they require less light for photosynthesis, they are more flexible than plants that require full sun or part shade.
![more]()
What type of sunlight does Banana shrub need?
Banana shrub does best with exposure to full or part sun. They will perform best with direct morning light, but in summer they need protection from the strong afternoon sun. In temperate environments, too much hot afternoon sun can burn the leaves, damaging the plant's appearance and health.
![more]()
Can sunlight damage Banana shrub? How to protect Banana shrub from the sun and heat damage?
Banana shrub planted indoors can easily be damaged by direct sunlight when it's moved outdoors. The best way to prevent sunburns from overexposure is to move pots gradually from a shaded area to a brighter spot, gradually. But even plants that are acclimated to the summer sun can be damaged by extreme heat. In a heatwave, it is important to keep the soil consistently moist so that plants can cope with excessive levels of heat. Moving plants in containers to areas with afternoon shade or erecting a shade cloth over them can protect sensitive Banana shrub during extreme weather events.
![more]()
Does Banana shrub need to avoid sun exposure? / Should I protect Banana shrub from the sun?
While bright morning sun and some full sun exposure can be highly beneficial for Banana shrub, the harsh, hot midday sun of summer can be too much to handle. If planted in the ground, the summer sun will usually ramp up slowly enough through the season for Banana shrub to gradually adapt to its intensity. But a potted plant that has been indoors or in a protected location will often suffer injury when placed suddenly into a location where the direct summer sun reaches it in the hottest part of the day. To protect this plant from the brutal afternoon summer sun, plant or place it in an understory location where it is shaded at midday by taller trees and plants or by a building or landscape feature.
![more]()
What will happen if Banana shrub gets inadequate sunlight?
When Banana shrub receives too little sun, they may become pale green or display drooping, yellow leaves. While some leaf drop is normal, if leaves are dropping but no new ones are growing in to replace them, it is a sign that something is wrong. If Banana shrub receiving inadequate light does manage to grow, the new growth is often spindly, pale, and prone to insect infestation. Paying attention to these signs and changing the lighting conditions of the plant will make a significant difference.
![more]()
Does Banana shrub need special care about sunlight during its different growth stages?
Tender, new leaves are especially sensitive to sunburn. Bearing this in mind, very young Banana shrub and when it's in a strong growth phase, such as in late spring and early summer, will be more sensitive to harsh sun and heat than the mature one or those in a more dormant fall growth stage. Banana shrub fresh from a nursery is also usually not prepared for strong full sunlight and must be introduced to it slowly.
![more]()
Are there any cautions or tips for sunlight and Banana shrub?
Recently transplanted Banana shrub will often experience a bit of shock and will need to be cared for carefully, either shaded from bright afternoon sun or placed in a protected area. On very hot days, you may see the leaves of Banana shrub drooping—this is usually nothing to worry about. Plants will send the water in their leaves down into their roots to protect them from burning. However, if the leaves are still drooping in the evening or the next morning, the plant needs water. Always avoid watering during the hottest times of day, as sunlight can hit wet leaves and scorch them easily. Banana shrub that has been underwatered will be weaker than that with consistently moist soil. This can leave it with weak roots that are unable to protect the leaves on hot, sunny summer days by diverting water away from the leaves. Care for an underwatered plant by giving it a long, deep watering and then allowing the top two inches of soil to dry out before the next watering. Even if it loses its leaves, if cared for properly it will grow new ones.
![more]()
What is the optimal temperature for Banana shrub?
The best temperature for Banana shrub to thrive is 65~80℉(18~27℃). During the primary growing phase, the highest temperature tolerable would be 95℉(35℃), while the lowest tolerable temperature would be 15℉(-10℃). This species is tolerant of low temperatures and will survive freezing winters. The perfect, highest, and lowest temperature range: Perfect:65~80℉(18~27℃) Highest:85~95℉(30~35℃) Lowest:-5~15℉(-20~-10℃) or below
![more]()
Should I adjust the temperature for Banana shrub during different growing phases?
Research shows that Banana shrub will begin to exhibit signs of stunted growth during prolonged periods of higher temperatures, especially during the development of axillary buds and the growth of main shoots. Keeping the temperatures consistent and cooler, around 65℉(18℃), will encourage vigorous growth after germination or transplanting.
![more]()
How can I keep Banana shrub warm in cold seasons?
Banana shrub can withstand freezing temperatures when planted in the ground in areas that don’t get below of 15℉(-10℃) as an extreme temperature during the winter months. But if planted in pots or containers, then their roots must be protected from the winter cold. Do this by wrapping the container in a blanket or bringing it inside where it will be fully protected from the elements.
![more]()
What damage will Banana shrub suffer if the temperature is too high/low?
Greater harm will come to Banana shrub if the temperature is consistently too high versus too low. If Banana shrub gets too hot, seed germination and photosynthesis efficiency is lessened due to hormone triggers caused by heat stress. The plant will show signs through wilting, leaf browning, and potentially death. If Banana shrub gets too cold, plant functions such as nutrient uptake and photosynthesis will cease, resulting in the possible death of the plant. If a single freezing event occurs during the growing season, then a membrane phase transition might occur, which can cause a cease in plant functions and death of the plant.
![more]()
What tips and cautions should I keep in mind when it comes to temperature for Banana shrub?
Keeping the soil temperature consistent is one of the most important strategies to keeping Banana shrub healthy, which leads to successful budding, flowering, and new growth. Do this by consistently watering, adding mulch to bare soil, and planting in the shade.
![more]()
How can I keep Banana shrub warm without a heat pad?
Due to the cold tolerance of Banana shrub, heating pads will not be necessary if planted outside in the ground. If the plant is in an outdoor pot, then bring it inside a heated house and place it in a sunny window during the winter months.
![more]()
How can I provide Banana shrub with an adequate temperature condition?
To ensure adequate temperature conditions are present, plant Banana shrub in an area with partial shade. If possible, use afternoon shade to provide the best protection during the hottest part of the day. This will also result in lower temperatures in the soil due to increased moisture retention. If Banana shrub is planted indoors, then keep the container away from windows and out of direct sunlight during the summer months to prevent the soil temperature from spiking daily.
![more]()
How can I save Banana shrub from temperature damage?
During the summer or times of high heat, give Banana shrub extra shade and water to help cool its leaves, roots, and soil. During cold snaps or growing season freezes, cover sensitive budding vegetation with frost cloth or water using sprinkler systems. If it’s only nearing freezing temperatures for a short period, then water during the day several hours before the freeze. If the temperature is predicted to remain below freezing for an extended period, then keep the sprinkler running until the temperature rises above freezing the following day.
![more]()
Should I adjust the temperature for Banana shrub in different seasons?
Banana shrub is a mid-temperature plant that can easily tolerate the typical fluctuations of the seasons and remain a hardy species when planted in maintained landscapes areas, containers, or indoors. Therefore, adjusting the temperature during the different seasons is unnecessary for primary growth. If flowering is stunted or impeded, then allowing the plant to experience a season of winter freeze could help to revive flowering.
![more]()
Under what conditions should I stop adjusting the temperature for Banana shrub?
If it becomes too difficult to lower the temperature for an indoor plant during the summer, then plant it outside in the ground or in a container. Make sure to plant Banana shrub in a shaded location and water often to keep the soil moist.
![more]()
Why do I need to fertilize my Banana shrub?
You need to fertilize a Banana shrub for a few important reasons. The most obvious of these reasons is that fertilizer will help your Banana shrub produce lovely blooms. Fertilizing in early spring is one of the best ways to ensure that your Banana shrub has excellent flowers during that season. Fertilizer also gives your Banana shrub plenty of energy that it can store in the ground during its dormant growth phases. Giving your Banana shrub some extra nutrients during the fall planting process or during the late spring will help your Banana shrub hold more energy to use once active growth resumes.
![more]()
When is the best time to fertilize my Banana shrub?
Timing is crucial when it comes to fertilizing Banana shrub. If you use fertilizer too early while the Banana shrub is still dormant at this time. This fertilizer cannot be used effectively and will be washed away by rainwater, causing waste and pollution. The first application of fertilizer should be applied in the early spring. Continue fertilizing once a month until early summer.
![more]()
When should I avoid fertilizing my Banana shrub?
Avoid giving Banana shrub a fertilizer with too much nitrogen, since this can lead to development of plenty of leaves but not many blooms. Look for fertilizer with a lower level of nitrogen compared to other nutrients. Do not fertilize after the early autumn, which can cause too much growth just before winter. Also, Banana shrub should not be fertilized during hot and dry times of year, since dry soil does not deliver fertilizer as effectively as moist soil. Fertilizing at this time can also stimulate growth which in turn needs more water that may not be available. It is best to keep fertilizer for earlier in the season when temperatures are cooler. Finally, remember that Banana shrub can absorb fertilizer that has been applied to nearby plants or lawns, so be cautious about inadvertently giving tree/shurb a double-dose of fertilizer.
![more]()
What type of fertilizer does my Banana shrub need?
The ideal fertilizer for a Banana shrub is one that has a relatively balanced mix of the three main plant nutrients, with slightly higher amounts of phosphorus. Alternatively, some gardeners choose to improve their Banana shrub 's soil by adding organic materials such as compost, worm castings, and manure. Some experienced gardeners will supplement 1-2 times with water-soluble fertilizers containing phosphorus when the flower buds start to appear. This will help the flowers develop better and allow them to grow larger and bloom longer. Fertilizers can come in many forms, and most of these forms will work well for your Banana shrub. However, some of the best fertilizers for Banana shrub come in either a liquid or a powdered form. Regardless of which you use, you should ensure that you dilute your fertilizer and apply it while watering your Banana shrub.
![more]()
How do I fertilize my Banana shrub?
Always follow directions for the specific type of fertilizer and do research on how to use it for the Banana shrub you are growing. It is important not to over-fertilize your Banana shrub, so determining the correct amount to use is crucial. The usual rule of thumb is to use the age of the tree (if known) or the diameter of the trunk to understand how much fertilizer should be used. Estimate a one-tenth of a pound of fertilizer per year or per inch of trunk, with a maximum of one pound. Granular fertilizers and organic fertilizers such as blood meal are applied by sprinkling the substance around the base of the tree all the way to the drip line (the space below the farthest-reaching branches) but do not let fertilizer come in contact with the trunk. Over time, the granules break down and filter into the soil to be absorbed into the roots. After fertilizing, spread an inch-deep layer of compost around the base of the tree and water thoroughly.
![more]()
What happens if I fertilize my Banana shrub too much?
It is far better to under-fertilize than over-fertilize, since you can always add more but you cannot easily take away excess fertilizer. Over-fertilizing your Banana shrub may cause brown leaf tips and edges, yellowing, wilting leaves, and possibly a visible crust of fertilizer salts on the surface of the soil around the tree. This condition is called fertilizer burn and results from too many accumulated salts in the plant’s cells. If excess nitrogen is the issue, the Banana shrub will produce a lot of leaves but won’t grow much flowers since nitrogen supports foliage growth. If you have overfertilized, you could try removing the top layer of soil under the Banana shrub to remove the most concentrated area of fertilizer. Then flush the area by watering heavily to try to get rid of fertilizer around the roots.
![more]()