ELECTRIC FLIGHT U.K. - British Electric Flight Association
ELECTRIC FLIGHT U.K. - British Electric Flight Association
ELECTRIC FLIGHT U.K. - British Electric Flight Association

You also want an ePaper? Increase the reach of your titles
YUMPU automatically turns print PDFs into web optimized ePapers that Google loves.
<strong>ELECTRIC</strong> <strong>FLIGHT</strong> U.K.<br />
ISSUE No. 81 SUMMER 2005<br />
THE MAGAZINE OF THE<br />
BRITISH <strong>ELECTRIC</strong><br />
<strong>FLIGHT</strong> ASSOCIATION
Discussion forums…<br />
THE HOME OF ....<br />
…FREE…<br />
� Areas for all types of glider, electric, fuel planes plus car and boat modelers<br />
� Galleries of hobby photos from modelers all over the world<br />
� E-<strong>Flight</strong> mailing list – thousands of members world wide!<br />
� Classified ads<br />
Three Separate In-depth Webzines…<br />
� Ezonemag.com, rcpowermag.com, liftzone.com<br />
� Regular columns and HOT NEW PRODUCT reviews in all areas of RC<br />
� YEARS of articles archived<br />
www.rcgroups.com
<strong>Electric</strong> <strong>Flight</strong> - U.K. Issue 81 - Summer 2005<br />
"To Encourage and Further all Aspects of <strong>Electric</strong> Model <strong>Flight</strong> in<br />
the <strong>British</strong> Isles and Elsewhere" - B.E.F.A. Constitution<br />
BEFA Committee 2005/6 ........................... 4<br />
Chairman's Chatter .................................. 5<br />
Current Lines ........................................... 5<br />
New-2-U ................................................... 6<br />
Readers’ Models ....................................... 13<br />
Letters to the Editor ................................. 18<br />
Pampered Jet & the Need for Speed .......... 20<br />
Balckpool & Fylde <strong>Electric</strong> Day ................. 25<br />
Going to Harvard! ....................................30<br />
Variable Pitch Propellers ..........................37<br />
CONTENTS<br />
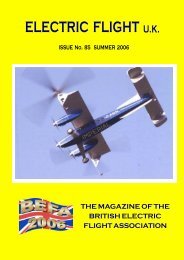
Cover Photo: The cover photo shows Dionne holding the Editor’s REM (Richard<br />
Etter Modellbau) Eagle Ornithopter. It has just had fitted a Himark 2025 brushless<br />
motor (4200 rpm/v) from All <strong>Electric</strong> RC (www.allelectricrc.co.uk), a Jeti 18-3P<br />
controller from Puffin Models (www.puffinmodels.com). It runs on 3S Kokam<br />
1250HS packs from IslandRC (www.IslandRC.co.uk) and the performance is<br />
now excellent.<br />
NEXT ISSUE. The copy date for the Autumn 2005 issue is 31 August 2005, with<br />
the magazine due for publication by 30 September 2005.<br />
DISCLAIMER<br />
A year flying with LiPo ............................. 41<br />
The Yorkshire Air Spectacular ................. 44<br />
A tale of Two Twins .................................. 48<br />
The 51st Toledo RC Exposition ..................55<br />
Hints & Tips ............................................60<br />
Event Calendar ....................................... 64<br />
For Sale / Wanted ....................................67<br />
New to <strong>Electric</strong> <strong>Flight</strong>? Start Here ............69<br />
BEFA Sales ............................................. 70<br />
Advertisers Index .....................................70<br />
B.E.F.A. and <strong>Electric</strong> <strong>Flight</strong> U.K. wish to point out that the content, techniques and opinions<br />
expressed in this magazine are those of the individual authors and do not necessarily represent the<br />
views of either the Editor of this magazine or B.E.F.A. and its committee.<br />
© All information in this magazine is copyright of the authors. Any request to use information<br />
from this magazine is to be made to the editor (contact details overleaf).<br />
All reasonable care is taken in the preparation and compilation of the magazine, but B.E.F.A. and<br />
its committee cannot be held liable for any error or omission in the content of this magazine or any<br />
subsequent damage or loss arising howsoever caused.<br />
To allow proper appreciation of the photographs used, colour copies of them will be posted on the<br />
B.E.F.A. website after publication of this magazine. If you can, check them out at www.befa.org.uk<br />
E.F.-U.K. 3
BEFA Committee 2005/6<br />
Chairman Robert Mahoney<br />
123 Lane End Road, High Wycombe, Bucks. HP12 4HF<br />
EMail: befa@rlmahoney.co.uk<br />
Secretary Peter Turner<br />
37 Church Street, Horsley, Derbyshire. DE21 5BQ<br />
Tel: 01332 881 265, Email: peter@alport.fsnet.co.uk<br />
Membership Secretary Bob Smith<br />
1 Lynwood Avenue, Tollesby, Middlesborough, Cleveland. TS5 7PD<br />
Email: bob.smith007@ntlworld.com<br />
Treasurer Bob Smith, details as Membership Secretary<br />
EF-UK Editor Jan Bassett<br />
111 Plantagenet Chase, Yeovil, Somerset. BA20 2PR<br />
Tel. 01935 472743, E-mail: editor@befa.org.uk<br />
Events Co-ordinator Terry Stuckey<br />
31 Dysart Avenue, Kingston-upon-Thames, Surrey. KT2 5QZ<br />
Email: terrystuckey@blueyonder.co.uk<br />
Competition Secretary Bob West<br />
51 Haweswater, Huntingdon, Cambs., PE29 6TW<br />
Tel. 07970 238 704, Email: robertj.west@tesco.net<br />
Midlands Representative Roger Winsor<br />
14 Butler Gardens, Market Harborough, Leics. LE16 9LY<br />
Email: Rogerwinsor7@aol.com<br />
Northern Representative Bob Smith, details as Membership Secretary<br />
Southern Representative Dave Chinery<br />
251 Station Road, Hayes, Middx. UB3 4JD<br />
Email: DavidDchinery@aol.com<br />
South West Representative Jan Bassett, details as Editor EF-UK<br />
Indoor & Free-<strong>Flight</strong> Rep. Gordon Tarling<br />
87 Cowley Mill Road, Uxbridge, Middx. UB8 2QD<br />
Email: gordon.tarling@ntlworld.com<br />
Technical Liaison Officer Alan Bedingham<br />
17 Highcliffe Close, Wickford, Essex. SS11 8JZ<br />
Email: bbba18333@blueyonder.co.uk<br />
Public Relations Officer John Thompson<br />
19 Park Avenue, Liversedge, West Yorks, WF15 7EQ<br />
Tel. 01924 515 595, Email: johnty99@ntlworld.com<br />
Webmaster Jan Bassett, details as Editor EF-UK - (www.befa.org.uk)<br />
Safety Adviser David Beacor<br />
34 Chestnut Close, Brampton, Huntingdon, Cambs., PE28 4TP.<br />
Please enclose an SAE with all correspondence to the committee.<br />
4 E.F.-U.K.
Chairman’s Chatter<br />
Dear members,<br />
Welcome to issue No 81. We are now half way through the 2005 flying season,<br />
doesn't time fly when you are having fun.<br />
Some of you may have missed me at fly-ins for the first part of the year (some say<br />
it's been very quiet for a change). I found myself in hospital after the Dortmund<br />
trip! But I am getting back to flying again.<br />
I have just read forthcoming events in the July issue of Quiet and <strong>Electric</strong> flight!<br />
The 7th August is a fly in at Leamington not a league event, The 4th of September<br />
is a BEFA fly-in at Hayes not a Southern Area BMFA event and on the same day,<br />
same site we are not holding a league event! Please always check before travelling<br />
to an event to see if there are any changes.<br />
The new <strong>Electric</strong> Up and Away book is available from the BMFA office in Leicester.<br />
It was made possible by our own Bob Smith via the BMFA achievement scheme<br />
review committee to which we have input on electric flight.<br />
All the best for the 2005 flying season and KEEP THE WATTS UP!<br />
Robert Mahoney<br />
Current Lines<br />
from the Editor<br />
Thanks to everyone that made a contribution to this issue. Again I only had just<br />
enough information for this issue and will need content for the next issue. I spend<br />
something like 50 hours compiling each issue, which is greatly increased if I have<br />
to hunt around for information. Please make my life easier by thinking what you<br />
can submit. It will only take you a little while to send a photograph and details of<br />
one (or more) of your models.<br />
I ask then when sending pictures from a digital source that you send the digital<br />
file to me by email or disc. The reason is that a lot of quality is lost when an inkjet<br />
print is scanned due to the dot pattern of the inkjet printer. It is less marked with<br />
a high quality printer and good photographic paper, but it is still a problem.<br />
Photographs printed from film do not have this problem as photographic film and<br />
paper are not pixelated.<br />
If you type your article using a word processor, please send me the file in an email<br />
or on a disc. My typing is pretty quick, but it is a lot quicker and easier when<br />
editing if I don’t have to retype it at all.<br />
Regards<br />
Jan Bassett<br />
E.F.-U.K. 5
New-2-U<br />
A Brief Round-up of New Items of Interest.<br />
If you are a manufacturer or retailer that has something new they want to<br />
share with the readers, please send details to the Editor (addresses on page 4).<br />
Pocket Infra-Red Thermometer<br />
This is a useful device that John A Thompson just discovered, which is a infra-red,<br />
contactless, thermometer. One use could be to check individual cells after charging<br />
or discharging, where any large discrepancy in temperature could be a problem.<br />
Another use is to ensure that your motor is not getting too hot during use, if you<br />
can see it you can measure the temperature.<br />
Just point it at the area to be checked, press the button and a large display will<br />
give the temperature within 1 second. It will also continue to display the<br />
temperature for 7 to 8 seconds.<br />
The measuring range is -30°C to +270°C (-22°F to 518°F) ± 2%. It can also be<br />
changed between Celsius and Fahrenheit by means of a switch in the battery<br />
compartment. The measuring beam has a length:width ratio of 6:1 allowing<br />
measurements to be taken at up to 30cm (12”) away from the object. A light is also<br />
incorporated which covers about the same angle as the IR beam so readings can be<br />
taken in awkward places.<br />
John bought his from CPC at www.cpc.co.uk or 0870 120 2530, and a catalogue<br />
will provide a wealth of interesting items at good prices. Delivery is exceptionally<br />
quick, usually next day and batteries are included.<br />
6 E.F.-U.K.
You probably heard through the grapevine that Flair Products Ltd went into<br />
voluntary liquidation in April 2005.<br />
The assets of the company have been purchased by a new business team, headed<br />
by Dean Gibbs, an energetic thirty something modeller. Flair was open for business<br />
again from 23rd May 2005 trading as Flair Models Ltd. Flair Direct is to close,<br />
the website will return to being the Flair website.<br />
The prime objective of the new team will be to restore Flair's once highly respected<br />
reputation for good quality products sold at a fair price with prompt delivery from<br />
stock. To kick start this rebirth we have employed the services of two well known<br />
individuals previously associated with Flair.<br />
Dudley Pattison, original founder of Flair, will be charged with restoring the<br />
key values of good service, supply from stock, and the reinstatement of the<br />
famous Flair range of kits. Dudley will adopt a hands on approach and will be<br />
a high profile face at future Flair events.<br />
Richard Smart, ex design director for Flair, is engaged to increase the product<br />
base and to ensure that Flair can supply not just an airframe but all the<br />
necessary accessories as well. Richard is also working on a number of new<br />
products that will be launched later this year.<br />
It is our intention to retain favourites from the Flair range and to develop/source<br />
new and exciting products for the future. New ARTFs will be introduced regularly<br />
and traditional items such as the Scout range, the Classic range etc., Spectrum<br />
paint, wheels, decals, canopies, accessories, etc. will all be standard stock items.<br />
You can keep up to date with Flair's new developments by visiting their web site<br />
(www.flairproducts.co.uk or www.flairmodels.co.uk). You will find details<br />
of exciting new products, the complete stock range, and masses of helpful<br />
information about their products so that you will be informed before purchasing.<br />
Flair's range will be available through all model shops listed on the website.<br />
In the event you cannot find stock of what you seek, or you cannot visit a shop<br />
locally, products will be available from the Flair online shop, or they can be ordered<br />
direct from the factory by phone (01793 721 303), fax (01793 721 841) or email at<br />
sales@flairmodels.co.uk<br />
The business team would like to assure all customers of our commitment to the<br />
above objectives and would like to thank all those modellers and traders who have<br />
contacted us to express their support.<br />
E.F.-U.K. 7
John Emms of Puffin Models have been busy again and bring another new crop of<br />
new items that may interest you.<br />
Shown right is a new Bel<br />
clamp ammeter which has<br />
a large, easily read, digital<br />
display and multimeter<br />
features. Clamp meters<br />
have the advantage that<br />
current readings can be<br />
taken quickly and in any<br />
electric power system.<br />
Clamp meters are<br />
recommended by a<br />
number of brushless speed<br />
controller manufacturers<br />
to avoid lengthened<br />
battery leads, which can<br />
contribute to damaging<br />
voltage spikes in some<br />
brushless power systems.<br />
It features 2 test sockets,<br />
and is supplied with test<br />
leads, for measuring of AC<br />
and DC voltage, diode<br />
checking, resistance, and<br />
a continuity tester.<br />
The primary ranges of this<br />
clamp meter are:<br />
Current<br />
AC or DC<br />
200A<br />
Voltage<br />
AC or DC<br />
200mV to 600V<br />
Resistance<br />
200Ω to 2MΩ<br />
The meter is supplied ready for use, with test leads and batteries, for £49.95<br />
Puffin is a mail order specialist, or can be visited at Unit D3, Backfield Farm,<br />
Wotton Road, Iron Acton, Bristol, BS37 9XD. They also have a website featuring<br />
their items at www.puffinmodels.com<br />
8 E.F.-U.K.
Right is shown the<br />
Reichard Sprinter,<br />
an exciting new<br />
hotliner design to<br />
combine hotliner<br />
performance with<br />
good handling. It<br />
features a 175cm<br />
one-piece wing<br />
which has a foam<br />
core, covered with<br />
balsa with carbon<br />
reinforcement and<br />
a glass cloth and<br />
epoxy skin. This<br />
is then covered<br />
with Oracover with contrasting red panels on the underside. The tailplane is of<br />
built-up construction and also ready covered in Oracover with a red underside.<br />
The fuselage is a high quality glass/epoxy moulding with silver pigment, it has<br />
the wing and tailplane fittings ready fitted. The canopy is a similar moulding<br />
with blue pigment and provides access to the battery compartment. The fuselage<br />
is spacious to take a 600 size motor and 10 RC-1600, 8 Sub-C or suitable LiPo cells<br />
and can be flown with low-cost 600 motors. Reichard recommend a Mega 22/20/3E<br />
with 8 RC-1600 cells which gives fantastic performance at an economical price.<br />
Designed for experienced model flyers and is available from Puffin Models for £99.95<br />
Below is the RCM Pelikan Dynamic 400, all-moulded, 400 size pylon racer of 70cm<br />
span. It provides fantastic performance when fitted with a Mega Mig 400 6v<br />
motor and 8 KAN 1050 cells. Brushless motors (Mega 16/15/3 or 16/7/7) provide<br />
unbelievable performance! The fuselage, wings, tailplane and all control surfaces<br />
are all produced from<br />
glass/epoxy in special<br />
moulds. It is supplied in<br />
different colours but<br />
always with a contrasting<br />
dark colour on the bottom<br />
of the wing and tail. It<br />
requires two servos up to<br />
9g for ailerons & elevator<br />
and requires a little skill<br />
to finish. Suitable for<br />
more experienced flyers,<br />
it is available from Puffin<br />
Models for £78.95 as are<br />
motors & accessories.<br />
E.F.-U.K. 9
Left is the LN Model<br />
Javelin, built by Libor<br />
Nezbeda of LN Model<br />
almost entirely of light<br />
balsa & covered in<br />
contrasting Oracover.<br />
The kit also includes<br />
high quality fittings,<br />
light foam wheels and<br />
CNC cut vinyl decals.<br />
Puffin usually include<br />
clear hinge tape with<br />
LN Models kits.<br />
The large centre hatch in the wing provides excellent access for the radio equipment,<br />
and mounts are built-in for 9g servos. The fuselage is a carbon rod. The Puffin<br />
Models demonstrator is fitted with a Model Motors AXi 2808/24 motor which<br />
provides true vertical performance with long leisurely flights using a 3S 1700mAh<br />
LiPo pack. At a flying weight of 600g the Javelin is extremely manoeuvrable and<br />
will perform “the book” within a very small space. The Puffin price is £59.95 for<br />
the basic kit or £65.95 with a 400 motor, MP Jet gearbox & quality prop driver.<br />
The LN Models Samba is shown below, which is a development of the popular<br />
Vermont Belle 1300 and designed for 8 to 10 cell brushless power systems. The<br />
Samba retains the excellent low speed handling, but the straight taper 130cm<br />
wing and hollow foam upper deck simplifies the construction. Most of the<br />
construction is light balsa and covered in Oracover giving a flying weight of 1.5kg.<br />
The generous fuselage size has a good amount of room for batteries and other<br />
equipment, with battery access through a large hatch in the nose. Puffin fly their<br />
Samba with a Model Motors AXi 2820/10 and 8 or 10 x 3300mAh NiMH cells.<br />
With increased elevator throw the Samba can perform 3D manoeuvres such as<br />
Harriers and Parachutes. The Puffin Models price is £109.95, which is £5 less<br />
than the Vermont which remains available from stock.<br />
10 E.F.-U.K.
Left: are the latest<br />
enhancement to the<br />
Jeti range, the<br />
“ADVANCE plus”<br />
brushless motor<br />
controllers, which<br />
remain blue with<br />
silver labels.<br />
Whilst these can be<br />
programmed in a<br />
limited manner by<br />
the old method of<br />
tones and squeaks,<br />
in conjunction with<br />
a thin detachable<br />
programme card<br />
(shown below) and<br />
it’s 6 jumpers, the<br />
6 features below<br />
can be set:<br />
Cells - Nickel or Lithium<br />
Cut-Off Voltage - High or Low<br />
Cut-Off - Slow Down (power models) or Hard (gliders)<br />
Brake - On or Off<br />
Timing - Low for 2,4 or 6 pole motors and peak efficiency<br />
or High for peak power from outrunners<br />
Throttle curve - Traditional Linear or new Logarithmic<br />
The logarithmic throttle options puts the ½ power point of the motor at about ½<br />
throttle stick, making the upper response<br />
much smoother and delicate. Whilst this<br />
will be appreciated by all, it is of especial<br />
value to helicopter and 3D flyers.<br />
The range is very economic and covers<br />
the range from 4A to 75A, with the 40A<br />
controller being around £65 and the<br />
programming card around £4.<br />
The complete range is available from<br />
Alan Fry of ImporTekniK, 29 Braiswick,<br />
Colchester, Essex, CO4 5AU. Phone or<br />
fax 01206 852 209.<br />
E.F.-U.K. 11
Following on from the last<br />
issue, Hyperion have issued<br />
a firmware upgrade for their<br />
emeter. This upgrade adds a<br />
servo tester to the impressive<br />
list of features previously<br />
included in the device.<br />
The firmware upgrade is<br />
available free of charge from<br />
the Aircraft World website at<br />
www.aircraft-world.com<br />
In order to use the servo<br />
tester you need to make a<br />
modified ‘Y’ lead following the<br />
instructions on the website.<br />
As shown right, a receiver<br />
battery pack is required to<br />
power the servo.<br />
Servo Test mode is entered by pressing buttons A, B & C when switching on the<br />
emeter. Pressing button B allows you to cycle through the low, mid and high<br />
settings for the servo range to suit almost any servo, radio system or installation.<br />
With no buttons pressed the servo will sit at the mid point. Pressing either button<br />
A or D, shown “end” in the display, causes the servo to move to that position until<br />
the button is released. Pressing button C starts “Cycle” mode and the servo moves<br />
mid - high - mid - low - mid continuously, until the button is pressed again.<br />
I (the Editor) have an emeter so downloaded the update and made a lead. Following<br />
the instructions, I installed the update with no problems. On switching on (holding<br />
A, B & C), and after initialisation, the display showed 1000 in each of the 3 settings.<br />
A few moments work changed these to 1000, 1500 and 2000 and had the servo<br />
merrily swinging between the 3 positions.<br />
The update also adds an averaging method for<br />
tacho readings which is supposed to give faster,<br />
more stable readings under some light conditions.<br />
It can toggled on or off by holding button A whilst<br />
switching on the emeter. When in averaging<br />
mode, the display on the “TACHO screen shows<br />
“(avg)” alongside the number of blades being read.<br />
The averaging function works on “TACHO” and<br />
“MOTOR” screens.<br />
The emeter is available in the UK from<br />
BRC Hobbies at www.brchobbies.com<br />
12 E.F.-U.K.
Readers’ Models<br />
Your chance to show the members your model(s).<br />
This is the 1912 Filey Flyer built by Paul Thorn from the Graham McAllister<br />
plan. It has a wing span of 48” (122cm), a wing area of 336 sq. in. (21.7dm2 ) and<br />
a flying weight of 22 oz. (623g).<br />
The airframe is balsa & ply which has been stained Mahogany and is covered in<br />
“Antique” LiteSpan. The controls are motor, rudder & elevator using SuperTec<br />
Naro/BB servos and a Webra Nano S6 receiver.<br />
Power is from a 6v Multiplex Permax 400 motor with 1.85:1 gearbox, Micro 480<br />
controller, Graupner 9” x 5” SlimProp and 7-cell pack of Sanyo 500AR cells. The<br />
undercarriage fitted features internal rubber suspension.<br />
E.F.-U.K. 13
The completed Messerschmitt Me 410 A-2 Hornisse<br />
On these 2 pages is the Messerschmitt Me 410 A-2 “Hornisse” of Chris Golds. It is<br />
60” (152cm) span and weighs 6 lbs. 2 oz. (2.8kg) ready to fly. It is powered by 2<br />
Mega 16/25/6 brushless motors and features retracts and flaps.<br />
The Me 410 looking very realistic on a run-up<br />
14 E.F.-U.K.
The Hornisse away!<br />
Chris with his Me 410 A-2 Hornisse<br />
E.F.-U.K. 15
The Westland Whirlwind taxiing out<br />
Fly by!<br />
16 E.F.-U.K.
A gentle flare, note the Fowler flaps down<br />
Another recent Chris Golds’ model on these 2 pages, this time a Westland Whirlwind<br />
of 72” (183cm) span. It is powered by 2 AXi 28 series motors and weighs 9 lbs. 1 oz.<br />
(4.1kg) with retracts and flaps.<br />
Happy modeller, Chris with his Whirlwind<br />
E.F.-U.K. 17
Letters to the Editor<br />
In response to one of my editorial notes in the “From Failure to Phoenix” article in<br />
the last issue, I received the following letter from Nick Fitton.<br />
“I would like to point out that your statement that the Graupner Speed<br />
600 Race 8.4v is recommended by Balsacraft for the Spitfire is incorrect.<br />
I attach a copy of the original instructions in which is stated that the<br />
Lightspeed 600 8.4v is the recommended motor, I don’t think anyone<br />
knows what the equivalent Graupner or Mabuchi unit is, so finding it in<br />
the MotoCalc database is impossible.<br />
Whilst I fully agree that the Race unit, suitably geared and on up to 10<br />
cells would have produced vastly improved performance, only experienced<br />
e-flyers would have known this, and at the time I most definately was not<br />
experienced!<br />
My article states that pitch speed and thrust fly aeroplanes. I believe that<br />
Watts/lb. is an overused and inaccurate predictor of aeroplane<br />
performance. Maybe an informative article from Bedders the All Wise<br />
would be a good thing for the readers.”<br />
Firstly I did not say that Balsacraft recommended the Speed 600 Rave 8.4v motor.<br />
I said “the designer of these models does not recommend the this motor (the<br />
Lightspeed 600). For a brushed motor he recommends the Graupner Speed 600<br />
Rave 8.4v”. Nick has misinterpreted what I said as the designer is not Balsacraft,<br />
it is Pete Nicholson.<br />
I do not know why Balsacraft recommended this motor, but they most definitely<br />
got it wrong in this case. For the twin motor designs these motors are well suited<br />
as 2 in parallel draw a reasonable current and give good power. In general most<br />
kit manufacturers recommend the reasonable equipment to get good flying<br />
characteristics, and some now offer options for brushed & brushless setups.<br />
The motor Nick picked in his analysis of the Lightspeed 600 appears correct as it<br />
seems to have similar performance to the Graupner 600 8.4v (Pt. No 3301). This<br />
is a relatively slow running motor and definately not ideally suited for fast models.<br />
The Graupner Speed 600 Rave 8.4v is extremely capable even direct drive. My<br />
HMM Crossfire was flying extremely well on a Graupner Speed 600 Rave 8.4v,<br />
Graupner 8” x 4” SlimProp and 8 RC-2000 cells. The static current draw was a<br />
little excessive at 36A, but it unloaded a lot in the air and was not excessively hot<br />
on landing. As the Crossfire is an aerobatic model less time is spent at high<br />
throttle settings, but it should be fine with proper use of the throttle.<br />
If any BEFA member is in doubt over the correct equipment for a model, they can<br />
always contact our Technical Liaison Officer for free advice.<br />
18 E.F.-U.K.
E.F.-U.K. 19
Pampered Jet and the<br />
Need for Speed (and Looks)<br />
Early Dreams<br />
by Bill Jackson<br />
Pampered Jet came into being following my much earlier longing to build a model<br />
jet with ducted fan propulsion. My early attempts at “jets” were designed with<br />
both tractor and pusher propeller driven versions with the i.c. motor exposed.<br />
I was impressed with the speed and handling, but disappointed by their lack of<br />
sleek jet-type aesthetics; though this was hardly noticeable when flying. I found<br />
that a pusher configuration offered a more efficient layout for speed and better<br />
appearance by leaving an uncluttered front end.<br />
At the time, I pondered on building an i.c. ducted fan model but was put off by the<br />
expense, complexity and no suitable flying field available locally.<br />
Later, soon after my introduction to electric RC flying, I started to notice that a<br />
few adventurous (and skilful) souls were flying electric ducted fan (EDF) planes<br />
with home built fan units and cobalt motors. These, according to the magazines’<br />
reports, were quite fast.<br />
Taking the Plunge<br />
Soon after this, commercially produced fan units and rare earth magnet motors<br />
(still expensive) became more widely available. I knew it had to be now or never.<br />
Going by the magazines, a popular set up was a Plettenberg 200-25-4 neodymium<br />
motor in a WeMoTec Mini-fan 480 unit. I counted out my pennies and placed my<br />
order, wincing at the price of £99 for a 480 size motor!<br />
Temptation to build a Lockheed Starfighter was resisted and I decided upon a<br />
more conservative “far-off scale” Pampa Jet in which to mount my investments.<br />
In my eagerness to get the model in the air, I went the short route of leaving the<br />
fan unit and associated wiring exposed, neglecting one of my very early intentions<br />
of building an aesthetically correct jet. However, in all other visual aspects I was<br />
quite pleased.<br />
Pampered Jet<br />
Pampered Jet, as it came to be called affectionately, had good flying characteristics<br />
except for one aspect, it was very slow and consequently could not reach altitude.<br />
As can be seen from the specification as follows, the size of the model is greater<br />
than the average 400/480 motor sized speed machine but it is slippery and has<br />
relatively low wing loading. I believe that one or more of the following factors may<br />
have been responsible for its lack of power:<br />
20 E.F.-U.K.
1) The battery pack of 9 Sanyo 800AR. These may have been a bit tired at<br />
the time and, compared to LiPos now being used, heavy.<br />
2) The WeMoTec Mini-fan 480 was supplied with an impeller whose blades<br />
had to be trimmed to fit the tube. This resulted in what appeared to be<br />
excessive clearance. Also, I didn’t have a magnetic balancer to achieve the<br />
optimum. I now have one and it is very recommended.<br />
3) I was expecting too much from the motor after all the money I had spent!<br />
Dismayed, I put the Pampered Jet in the loft and got on with other projects; more<br />
on this later.<br />
Going Brushless<br />
It wasn’t long after this that I was talking to Kevin Saunders regarding my next<br />
step in the need for speed. When I asked for his opinion on going for a bigger<br />
version of the brushed Neodymium motor in a Midi-fan, he advised me to go instead<br />
for a brushless set-up. Up to that point I hadn’t considered a brushless motor,<br />
dismissing the idea as too advanced technology to chance my available cash on.<br />
I scoured the magazines, noting what brushless motors were being used and their<br />
applications. I initially decided that a Hacker (540 size) would fit the bill,<br />
surprisingly, no more expensive than a similar sized Neo brushed motor. However,<br />
an expensive brushless speed controller was necessary.<br />
When I thought my mind was made up, I noticed the existence of the Mega range<br />
of brushless motors at virtually half the price of others and a reputation for quality.<br />
After talking to a very helpful John Emms of Puffin Models, I walked away with a<br />
Mega 22/20/3, a Jeti 70-3P opto controller and a WeMoTec Midi-fan.<br />
I avoided talking to my wife about what I had bought when I got home from the<br />
show but I had a warm feeling about my new “investments” (a term often used by<br />
a friend to placate her husband when she frequently bought new dresses).<br />
Suki<br />
I installed the new gear in a scratch-built Sukhoi 27 drastically modified (and<br />
called Suki) from a previous project. I chopped off the read end in an effort to<br />
reduce the weight and drag.<br />
There had been no complications or problems in the installation, and elation wasn’t<br />
the word on the first flight! I enjoyed every second of the smooth and fast event.<br />
The “investments” were worth every penny, and I knew then that there would be<br />
no turning back, BRUSHLESS was the way forward for me, thanks Kevin.<br />
This was a couple of years ago. In the meantime I increased the size of the battery<br />
pack of 12 x 1950-FAUP to 14 cells, to realise the full potential of the Mega motor<br />
for even more exhilarating flights. Even the oily fan flyers in my club are impressed.<br />
Wattage F86 Sabre<br />
E.F.-U.K. 21
The Suki<br />
Last year at the Wings & Wheels show I chanced upon a Wattage F86 Sabre kit<br />
going at a sale price of £39. I couldn’t turn it down, considering the full price of<br />
this is normally around £63 including the fan unit, special Wattage 400 size motor<br />
and wiring, it was excellent value.<br />
Domestic neglect ensued until the completed machine was sitting pristine on the<br />
lounge carpet, straining to get outside and tear up the sky.<br />
I installed the 3-cell pack of Kokam 2000mAh LiPo cells (I am now getting used to<br />
spending without fear!) and my son hand-launched the brave Sabre in search of<br />
MiG 15s. My early dream of owning a ducted fan model that really looked like a<br />
jet was realised. OK it was small and from a kit, but I was pleased that I had<br />
assembled and successfully flown it. I was surprised how fast it was with an<br />
inexpensive brushed 400 motor.<br />
After several enjoyable flights I decided to make it even smarter by covering the<br />
exposed polystyrene foam fuselage in tissue, put on with thinned PVA. Than a<br />
couple of coats of Humbrol aluminium and reapplied decals made it look magnificent.<br />
The model was fitted with a GWS Naro 4 channel receiver (lightweight but with<br />
full length aerial) that had given years of very good service previously in a jetstyled<br />
400 powered wing. This was covered with a matt non-metallic FibaFilm<br />
and had given no control problems even at distance.<br />
Soon after the Sabre got its new coat, pronounced glitching was experienced when<br />
22 E.F.-U.K.
the model was coming towards me. I noticed this only happened when the<br />
transmitter aerial was pointing towards the model, which is a weak signal situation<br />
for the model.<br />
I made a mental note to always fly in future keeping the transmitter aerial pointing<br />
away from the model. However, after a hectic mission over “North Korea” and on<br />
the landing approach at an altitude of 40 ft with sufficient speed, the Sabre rolled<br />
over onto it’s back and from then on refused to respond to my control inputs. It<br />
went in vertically the ground refusing to move out of the way. Then I noticed my<br />
transmitter aerial was pointing towards the models (or what was left of it).<br />
I believe the crash was caused by a combination of a comparatively weak signal<br />
arriving at the model then being scattered and/or blocked by the metallic finish of<br />
the fuselage, even though the receiver aerial exited just behind the cockpit and<br />
passed through the top of the fin.<br />
As I trudged very sadly home from the field with the bits under my arm, I realised<br />
that the last time I had experienced glitches serious enough to cause control problems<br />
and crashes was many years before when flying a stand-off scale electric F22<br />
Raptor covered silver FibaFilm. The Raptor had a nose mounted Spirit motor and<br />
propeller, and a “full range” receiver.<br />
If anyone has any advice regarding this problem please let us know. (Editor: I<br />
always find that a range check shows up any problem. It could also be due to<br />
insufficient suppression of the brushed motors - remember to use 3 capacitors.<br />
Couple this with the effective loss of aerial length for that part shielded by the<br />
fuselage and interference is more likely).<br />
The only salvageable bit of the Sabre was the fuselage which had sustained only<br />
damage to the nose . . . tough combination that polystyrene covered in tissue<br />
(some use brown paper) put on with PVA.<br />
Improved Pampered Jet<br />
As I put the damaged Sabre fuselage in the loft to use for something in the future,<br />
I noticed Pampered Jet looking neglected in a dark corner. To cut a long story<br />
short, I removed the old Mini-fan & Plettenberg from Pampered Jet and grafted on<br />
the read half of the salvaged Sabre fuselage, still fitted with the Wattage fan and<br />
brushed 400 motor. I was elated with the result . . . Pampered Jet looked attractive<br />
and jet-like.<br />
As she took to the sky anew, and with the 3 x 2000mAh LiPo pack fitted, I was<br />
rewarded with much improved speed and performance. Aerobatics and altitude<br />
were will within my grasp. The model can not be described as being very fast, but<br />
considering the size of it and the modest power train (thanks to Wattage) I am<br />
impressed. I also believe the LiPo pack has been contributing to overall good<br />
performance since its introduction first on the Sabre.<br />
I have had many enjoyable flights with improved Pampered Jet and never<br />
E.F.-U.K. 23
experienced a glitch (it is worth noting that a larger “full-range” receiver was<br />
fitted). I have always been rewarded with smooth, majestic and scale-like flights.<br />
I am happy again.<br />
Specification:<br />
Span 42 in. 107 cm<br />
Wing Area: 300 sq.in. 19.5 dm2 Weight: 28.6 oz. 802 g<br />
Wing Loading: 13.8 oz./sq.ft. 41.4 g/dm2 Wattage modified 400 motor, Wattage fan and 3S Kokam 2000mAh LiPo<br />
Exciting Present and Future<br />
The improved Pampered Jet<br />
We are spoilt for choice in the wide rage of brushless motors, speed controllers and<br />
advanced batteries (especially LiPo) now available and prices dropping all the time.<br />
So if you feel the need for speed, or want to slow fly indoors, or just wish to achieve<br />
more efficient performance, look into all the latest technology waiting to serve you,<br />
you will not be disappointed.<br />
As for me, now where’s that plan for the Lockheed Starfighter . . . ?<br />
24 E.F.-U.K.
Blackpool & Fylde <strong>Electric</strong> Day<br />
by John A Thompson<br />
This must be the fifth or sixth time I have attended this event and it has always<br />
been a pleasure. They are such a friendly bunch, making everyone welcome, and<br />
organising things without any fuss. One advantage is the barbecue, which is not<br />
only good and cheap, it is free to pilots.<br />
The Weeton site was in first class condition with the grass well mown, and the<br />
Club have acquired a superb clubhouse complete with toilet, a bonus for us oldies<br />
and the ladies.<br />
After the unfortunate incident last year the Club had banned any charging in the<br />
car park, and provided two heat resistant tables on the flightline for charging<br />
LiPo packs, a wise precaution.<br />
The weather was initially overcast with a stiff chill wind off the Blackpool seafront,<br />
but gradually brightened up during the day.<br />
A vast selection of models were flown ranging from the simplest ARTF to a<br />
Sunderland and even Lancastrian. A large Mustang with retracts flew well, but<br />
was spoilt in my opinion by the caricature Prince Charles in the cockpit.<br />
The raffle featured a (dare I say it) glow powered model as a prize, which had been<br />
built by the club as a project. All in all a grand day out, well done lads.<br />
E.F.-U.K. 25
26 E.F.-U.K.
E.F.-U.K. 27
28 E.F.-U.K.
E.F.-U.K. 29
Going to Harvard!<br />
by Dave Chinery<br />
Although a keen student of the Bring & Buy table I found no bargains at this<br />
year's AGM, but the previous BEFA indoor event, the 2004 Technical Workshop,<br />
yielded a real prize. Adorning the "Bring & Buy" table was a stunning scale<br />
model, ideal for my customary 14-cell set-up, a V-Mar Bombardier Harvard 2.<br />
The RAF's Tucano trainer is well-known, and had been extensively modelled, not<br />
least by our own Nigel Hawes.<br />
The Swiss Pilatus PC-9 is a competitor to the Brazilian Tucano, and several models<br />
of this aircraft are available, particularly a smart and inexpensive ARTF from<br />
Seagull Models.<br />
The Royal Canadian Air Force uses a version of the PC-9, license-built by Bombardier<br />
Industries, and calls it the Harvard 2, after the noisy radial-engined WW-2 trainer.<br />
Although the models are almost certainly manufactured in China, or a similar<br />
low-cost area, the V-Mar company is based in Canada. In their extensive range of<br />
models, they produce two ".45-size" versions of the Harvard 2, a red one, and<br />
another in dark blue RCAF livery.<br />
Using their new 3D detailing system, VCOTE 2 - 3DS, the model is covered with<br />
detailed and realistic panel and rivet lines, and sports a fitted cockpit with two<br />
pilots firmly harnessed in.<br />
The model that took my eye on the Bring & Buy was just that, and I was captivated<br />
by the potential for a really realistic electric model. With few exceptions (the<br />
Tucano being one) propeller-driven subjects for electric scale models are pistonengined<br />
types, like the Chipmunk or the original Harvard, for instance.<br />
Without going to the complication and weight of sound systems like that in John<br />
Ranson's He111, electric models just don't sound right. However, the Harvard 2<br />
is powered by a PT-6 turbine! Add the realism of the model's appearance, with a<br />
scale-like three-bladed propeller, and the "turbine" sound of an electric motor, and<br />
the potential for utter believability is high.<br />
Having closed a satisfactory deal at the Bring & Buy, the Harvard was carried<br />
home in triumph and put in my loft for several months. There was insufficient<br />
room in my garage to take another model this size, so it had to be put away until<br />
I made room. To do this, I decided to dispose of my other V-Mar model, the<br />
Chipmunk I reported on last year.<br />
Despite several attempts to sell it on eBay, the BEFA website and other places, it<br />
was still there in March, so in the end I stripped it of "gubbins" and consigned the<br />
airframe to the loft. With a Harvard-sized space freed-up in my garage, it was<br />
time to get to work!<br />
30 E.F.-U.K.
Oil get it done quickly!<br />
The original owner had built the model with glow power, so there was a considerable<br />
amount of work necessary for the conversion. Apart from the usual light oil film<br />
on the model, the biggest problem was the cowl, which had, understandably, been<br />
extensively cut away to clear the original engine.<br />
I contacted V-Mar's main importers, MacGregor Industries, at Langley, who were<br />
very helpful and found a spare cowl in a split-up kit. The cowl was red, to suit the<br />
other version of the model, but a quick spraying session on a warm spring day<br />
sorted that out.<br />
Having sorted the cowl problem, I stripped the oily bits from the model. The<br />
engine bearers, nosewheel, and fuel tank were attached either side of a removable<br />
firewall bolted to the front of the fuselage proper. All except the nosewheel were<br />
discarded, and the new motor offered-up to the "firewall". The airframe was<br />
thoroughly washed to remove as much of the oil film as possible, and I was relieved<br />
to see that the interior of the fuel tank bay was clean and dry.<br />
The GO bits!<br />
The motor removed from the Chipmunk was the original PJS 3000 unit I had<br />
assembled the model to test. Whilst working perfectly, this motor would not fulfil<br />
my intentions for the Harvard.<br />
The unusual arrangement of attaching propeller blades direct to the motor case<br />
meant that I would not be able to fit a three-bladed propeller eventually, and its<br />
The AXi 4140 motor & radial mounting kit. Note: thrust collar with allen key inserted<br />
E.F.-U.K. 31
large diameter meant severe butchery of the front of the cowl to clear it.<br />
I have two other models this size with Model Motors AXi 4120/14 motors, which<br />
are inexpensive and give a superb performance. I decided to buy another one, and<br />
this time take advantage of the radial mounting option made possible by the third<br />
bearing fitted to the latest versions of the motors. Puffin Models were able to<br />
supply the motor and adaptor kit.<br />
The radial mounting kit (see photo) contains a cruciform mounting spider, together<br />
with a threaded propeller adaptor which screws onto the "back" end of the motor.<br />
In addition to the necessary screws, a large collet is supplied, which fits over the<br />
normal shaft. At first, I was puzzled by this, then the penny dropped.<br />
Used normally, the shaft is retained in the stator housing by a small, thin circlip.<br />
Propeller thrust tends to pull the shaft out of the motor, unloading the circlip.<br />
However, used with the radial mount, this little circlip would have to take all the<br />
propeller thrust, and might not be "man" enough for the job. The collet is attached<br />
by a thread-locked grub-screw hard up against the circlip to back it up solidly<br />
against thrust loads.<br />
The mounting spider and propeller adaptors were then attached using thread-lock<br />
on the screws, and the motor was ready to mount.<br />
All the models I have seen so far with the radial-mounted AXi motors have a<br />
spacer box built-up to stand the motor the correct distance off the firewall. Peter<br />
Nicholson's big Corsair is a case in point. My original intention was to do this too,<br />
but I came up with a simple and more adjustable idea.<br />
Rather than have four screws to attach the motor to the box, then four more to fix<br />
the box to the firewall, I decided to mount the motor on four lengths of 2BA studding<br />
(see photo). "Penny" washers spread the load into the rather soft ply "firewall",<br />
and pairs of nuts are locked up tight at each end to attach the studding to that and<br />
the motor.<br />
I had to drill out the end holes<br />
in the motor spider to clear<br />
the studding, but that was<br />
the only complication, and I<br />
had the motor mounted in<br />
about half an hour.<br />
I was easily able to adjust the<br />
motor thrust line to give<br />
sidethrust and a little<br />
upthrust as well - this is a<br />
low-wing model after all.<br />
The weight of the mounting<br />
The AXi motor on the radial mount<br />
arrangement was probably<br />
32 E.F.-U.K.
higher than I could have achieved if I had tried to make it light, but I need a little<br />
nose-weight in this model. The intention was to allow the model to be used with<br />
NiCd or LiPo packs.<br />
Because of the difference in weight of the two battery systems (the 2100mAh 4S 1P<br />
LiPo weigh only 35% of the equivalent NiCds) they must be mounted on the centre<br />
of gravity, therefore I need the model to balance without them in place. A little<br />
weight in the nose (doing a useful job) is therefore good!<br />
To this end, I have also attached the 700mAh RX NiCd to the studding, and added<br />
even more nose-weight in the shape of a separate nosewheel steering servo. The<br />
model originally had a link to the nosewheel steering from the rudder servo, as is<br />
customary, but this would<br />
have seriously impeded the<br />
area where I wanted to<br />
mount the battery, so a<br />
separate servo killed two birds<br />
with one stone!<br />
The servo is mounted in the<br />
bottom of the "fuel tank bay",<br />
and the short pushrod<br />
features a springy "pigtail<br />
loop" (see left) to cushion the<br />
servo gears from the worst of<br />
The nosewheel servo shock absorbtion system<br />
the wheel shock loads.<br />
Weight & balance<br />
First, the good news! With the components arranged as described, the model<br />
balances perfectly with either or no battery installed. The bad news is that the<br />
weight with two seven-cell NiCd packs is nearly 8lb! The LiPo installation saves<br />
about 8oz., so will be used for the test flight, until the handling is checked-out.<br />
I would normally fit flaps to a model of this type and wing loading, but it has strip<br />
ailerons, which prevent this. I could separate the inboard ends of the strip ailerons<br />
and use them as flaps, with separate mini-servos to operate the outer ends as<br />
ailerons.<br />
However, I do not want to mess up the detailed covering to gain access to the<br />
"innards" to fit and connect the extra aileron servos, which would also add even<br />
more weight. I'll wait and see how easy it is to land ----.<br />
<strong>Flight</strong> of fancy!<br />
I didn't have to wait long to find out how well the Harvard would fly. The next<br />
Sunday yielded fine weather but with a stiffish breeze, enough to dissuade most of<br />
my clubmates from flying. However, in view of the weight and "solidity" of the<br />
Harvard, I considered the breeze to be an advantage in taking off, at least.<br />
E.F.-U.K. 33
To give the model its<br />
best chance, it was<br />
loaded up with the<br />
LiPo pack, and<br />
The “firewall” with motor, speed controller and nose wheel fitted<br />
passed all functional<br />
and radio range<br />
checks with flying<br />
colours. Having run<br />
out of excuses, it was<br />
time to see how it<br />
would fly!<br />
The throttle was<br />
opened smoothly and<br />
the model tracked<br />
rapidly down the<br />
runway, the nose<br />
wheel steering being<br />
used to keep it<br />
straight in the slight<br />
crosswind.<br />
Lift-off came well<br />
before the end of the runway, and she climbed rapidly at about 30° until I levelled<br />
her off and throttled back to a cruise climb at about 50ft. Climbing round the<br />
circuit, I found the controls to be smooth and positive, and the model tracked<br />
steadily through the rather gusty air. I found I could position the model wherever<br />
I wanted it, and made a few basic circuits to satisfy myself about the handling.<br />
The only adjustments I had to make were a couple of clicks of down elevator trim.<br />
The third time round, I applied full power whilst turning into wind and tried a<br />
loop. The sleek model carried good speed over the top, and I was able to throttle<br />
back to about ¼ power coming down the other side. I already knew that the<br />
ailerons were positive, and the loop was followed immediately by a roll. The rate of<br />
roll was less than I am used to with the Sukhoi and Vermont Belle, but entirely in<br />
character with the Harvard.<br />
OK, so this heavy model was fast and manoeuvrable, but how would it fare at low<br />
speed? Now well into the flight, it was time to try the low-speed handling. Climbing<br />
to about 150 feet, I throttled back and held the nose up as the speed dropped off,<br />
reaching nearly full up elevator before the nose dropped, slightly to the left. Power<br />
was restored and a power-on stall tried. This was similarly undramatic, so I made<br />
a few trial approaches for the first landing.<br />
Conscious of the model's cleanliness and speed, the final approach was made level<br />
at about 4 feet up as the speed bled off. The model tracked dead straight through<br />
the gusty air, and I was easily able to line it up with our narrow runway. It<br />
34 E.F.-U.K.
touched down "on the numbers" and rolled to a stop without a bounce, finally<br />
taxying back about 30 yards to the start of the pits. A perfect landing!<br />
As the LiPo pack was removed, it was found to be just warm, so the current drain<br />
was within limits. I was extremely satisfied with the way the model had flown,<br />
and although the wind was still increasing, I decided to see how it would go, some<br />
8oz heavier, on NiCds.<br />
After a five-minute wait to let the breeze blow through and cool the motor and<br />
controller, I made the second flight using two of my oldest seven-cell 2400mAh<br />
NiCd packs. In spite of the extra weight, it was hard to tell any difference in the<br />
flight characteristics compared to the LiPos.<br />
I tried some more aggravated stalls, and finally whacked on full up elevator and<br />
left rudder to try a spin. The model entered the spin positively to the left, taking<br />
up a proper attitude of about 45° nose down. After about two turns, I released the<br />
controls, and she stopped rotating immediately and came out into a dive, which<br />
was recovered with plenty of height left. The remainder of the flight was used to<br />
explore more advanced manoeuvres such as hesitation rolls, stall turns and Cuban<br />
eights, which she performed with flying colours.<br />
The second landing started like the first, coming in nicely lined-up, but a lastminute<br />
crosswind gust made her touch down in the slightly longer grass at the<br />
side of the runway, when she stopped very quickly. There was no damage, not<br />
The completed Harvard 2 ready to go<br />
E.F.-U.K. 35
even a bent nosewheel leg, but I took the hint and called the day's flying to an end<br />
even though I had more batteries ready to go.<br />
A couple of days later, I made 3 more flights, extending the model's repertoire as<br />
far as a rolling circle, but leaving the Lomcevak and Avalanche for another day!<br />
Debrief<br />
To summarise, I am delighted with the model's looks and flying characteristics. I<br />
found it exceptionally easy to land in breezy conditions, although it might come in<br />
a bit fast in a flat calm - I will have to wait and see!<br />
A few "tidying-up" tasks remain, including fitting a more scale-like 3-bladed<br />
propeller and spinner, and the plastic "oleo legs" need de-greasing and painting<br />
silver. It will then be ready for the new rally season, so if you want to see it fly,<br />
come along to one of the BEFA fly-ins during the summer.<br />
Meantime, for specifications and availablility of this model, or any of the others in<br />
the V-Mar range, contact MacGregor Industries on 01753 549 111 or at<br />
www.macgregor.co.uk<br />
A very happy Dave after the successful completion of the first flight<br />
36 E.F.-U.K.
Variable Pitch Propellers<br />
by Don Stanley<br />
Whist browsing through my Internet files, I came across a file called “varioPROP”<br />
which I downloaded in 2002. This is a variable pitch propeller that has 2, 3 or 4<br />
blades and is marketed by Ramoser Technik+Design. They claim that with the<br />
turn of a screw the propeller can be set to “exactly the desired pitch” and from the<br />
photograph it is of the type that rotates the blades to change the pitch. From my<br />
experience of designing and making and measuring propellers, I believe this to be<br />
a rash statement and I will explain why this is so.<br />
The pitch of a propeller is determined by the angle of the blade to the airstream,<br />
and the radius at the point on the blade that we are considering. It is defined as<br />
the forward motion made by the propeller as it “screws” its way through the air in<br />
one revolution of the blades assuming no slip between the air and the blade.<br />
This is generally called the “Geometric Pitch” which is dependent on the angle<br />
between the back of the blade and the plane of rotation. Most model propellers are<br />
of the constant pitch variety, which means that the pitch is the same along the<br />
blade and this gives the propeller its familiar twist. However, most commercial<br />
propeller makers usually incorporate a little wash out towards the blade tip.<br />
If we call the geometric pitch of a propeller P, the blade angle α, and r the radius<br />
of any point along the blade.<br />
Then P = 2.ð .r.tan α or α = tan-¹ (P/(2.ð .r))<br />
A small error occurs here as the angle of the back of the blade is assumed to be the<br />
true aerodynamic angle of attack which is not quite the same thing. This is<br />
affected by the camber of the blades aerofoil section. The error is small and does<br />
not change the argument presented.<br />
So for a propeller of say 250 mm diameter and of 150 mm pitch (approx. 10” x 6”)<br />
we can calculate the angle α at various points along the blade (see table 1).<br />
Now we will increase the pitch by rotating the blade in the hub so as to increase<br />
the blade angle by 5°. We simply add 5° to each angle and recalculate the pitch<br />
r α p r new α new p<br />
25 43.7 150 25 48.7 179<br />
50 25.5 150 50 30.5 185<br />
75 17.7 150 75 22.7 197<br />
100 13.4 150 100 18.4 209<br />
tip 125 10.8 150 tip 125 15.8 222<br />
Table 1 Table 2<br />
We can see immediately that the pitch has increased but is now no longer constant,<br />
and has in fact acquired quite a lot of “wash in” The reverse happens if the blade<br />
E.F.-U.K. 37
angle is reduced so as to reduce the pitch, the blade acquires a lot of wash out.<br />
Neither of these extreme conditions is desirable in a propeller for the same reason<br />
that they are not desirable in an aircraft wing. It is hard to see how such a<br />
propeller can be set “exactly to the desired pitch”.<br />
I believe that this is the way that most variable pitch propellers work, including<br />
the full size ones, and is the result of twisting the entire blade to increase the<br />
pitch. To maintain a constant pitch it is necessary to reduce the twist as the blade<br />
tip is approached, which seems quite a difficult thing to do. To minimise the wash<br />
in when increasing pitch the designer could introduce a little wash out when set at<br />
fine pitch and also keep the increase of blade angle to a minimum.<br />
There is another way of varying the pitch of a propeller blade, and that is to<br />
increase its diameter. We will do this in table 3 adding 10mm to each radial point<br />
on our 250 diameter 150 pitch propeller, and recalculate the pitch. The pitch has<br />
increased as expected but we have a blade with some washout. If we reduce the<br />
blade diameter by 10mm we get in table 4<br />
r new r α p new r α p<br />
25 35 43.7 210 15 43.7 90<br />
50 60 25.5 180 40 25.5 120<br />
75 85 17.7 170 65 17.7 130<br />
100 110 13.4 165 90 13.4 135<br />
125 135 10.8 162 115 10.8 138<br />
Table 3 Table 4<br />
The pitch has reduced but we have strong wash in. Combining the 2 methods by<br />
increasing the radius by 10 mm and rotating the blade by 2.5° gives us table 5.<br />
And increasing the radius by 20 mm and the blade angle by 5° gives us table 6:<br />
new r new α p new r new α p<br />
35 46.2 229 45 48.7 322<br />
60 28.0 200 70 33.0 286<br />
85 20.2 196 95 25.2 281<br />
110 15.9 197 120 20.9 288<br />
135 13.3 200 145 18.3 301<br />
Table 5 Table 6<br />
If we decrease the radius by 10 mm and reduce the blade angle by 2.5° we get:<br />
new r new α p<br />
15 41.2 82<br />
40 23.0 107<br />
65 15.2 111<br />
90 10.9 109<br />
115 8.3<br />
Table 7<br />
105<br />
38 E.F.-U.K.
The collected results are shown plotted in the above graph and show the pitch<br />
change calculated in the various tables.<br />
Bear in mind that we are looking for the least variation in pitch along the blade.<br />
The plots for +20mm diameter with +2.5° angle and -20mm diameter with -2.5°<br />
angle give fairly decent pitch distributions. Hubs that incorporate a change of<br />
propeller diameter as well as rotating the blade to change the pitch seem to be a<br />
useful way of achieving variable pitch.<br />
I think that a propeller hub that allowed both rotation and extension to the blades<br />
in the correct proportion would be a complex, fragile and expensive item. However<br />
I have used the ideas to modify and extend my collection of Aeronaut folding<br />
propellers by making new hubs that give the blades a different diameter and at<br />
the same time there is an opportunity to change the blade angle by a few degrees.<br />
The photograph overleaf shows such a hub. The sidepieces are made from 1.85mm<br />
alloy strip and the centrepiece is of hardwood, in this case Ramin. The 3mm pivot<br />
holes are drilled with the sidepieces clamped together as is the 1/16” hole through<br />
the centre. The side arms and the hardwood centre are assembled and clamped<br />
using 24hr epoxy. A piece of 16 SWG piano wire is pushed through the centre<br />
holes for alignment and is removed after the clamps are in place.<br />
The width of the assembly is 12mm, and the centrepiece is 8mm wide to<br />
accommodate the Aeronaut blades. Small changes to the blade angle are achieved<br />
by twisting the open ends of the hub. Changes of ±5° can be introduced. The bolts<br />
are 6 BA steel. I have used this design for motors up to a geared Speed 600 and<br />
power levels up to 200W.<br />
E.F.-U.K. 39
A word of warning, if you are not confident in your engineering skills do not attempt<br />
to mess about with home made propeller hubs, for safety’s sake.<br />
You can contact me by email at dfamstanley@onetel.com<br />
(Editor: As I have some of the Ramoser varioPROP units, I thought I’d check<br />
one out. I took an 8B hub and 9.7” scale optic blades and set it mid-range at 6”<br />
pitch, which I thought would be the pitch the blades were optimised for. I<br />
measured the blade pitch angles and graphed the result, shown below.)<br />
40 E.F.-U.K.
A year of Flying with LiPo<br />
By Malcolm Mackendrick<br />
I have been flying electric powered models for about 8 years now and going totally<br />
electric about 5 years ago. I've also replaced the brushed motors with brushless in<br />
14 of 19 of my models.<br />
After the introduction of Li-Ion then LiPo batteries I read everything but did not<br />
plunge in as I had a considerable investment in NiCd and NiMH batteries and 4<br />
good chargers. I could go flying all day and until my lead acid batteries were down<br />
could charge up batteries faster than I could fly them flat!!<br />
Last year as several of my packs were in need of replacement, I bit the bullet and<br />
bought two 3S1P 1600mAh and a carbon backed 3S2P 3200mAh pack from<br />
<strong>Flight</strong>power. (Editor: BEFA have told <strong>Flight</strong>power on a several occasions about<br />
the risks of putting LiPo cells in a conductive, flammable cladding. If the pack<br />
does catch fire, it just adds fuel, and dangerous pollutants, to the flames.)<br />
The first aircraft flown with these packs were those where the CG variation by<br />
lighter pack usage did not change. My Crossfire which has an AXi 2814/10 was<br />
transformed to near vertical climb and about 14 minutes flying time. (I set timers<br />
for all aircraft leaving a reserve. The Crossfire is set at 10 minutes)<br />
My first charger was a Kokam basic giving up to 1.5A but very easy to use. I did<br />
not try and set up my Chameleon chargers for LiPo. Firstly I found programming<br />
it difficult and as I was using them to charge NiCds I had them on auto charge for<br />
that and couldn't rely on not having a "Senior Moment".<br />
All my battery purchases in the last few months have been of the same LiPo packs<br />
except that with 2 carbon cased 3S2P packs I decided that the extra 30g was<br />
undesirable. I now wire up all my aircraft to take as many packs in parallel as is<br />
needed for the output amperage required.<br />
For Example my Vasa ducted fan tailless jet uses 2 of the 3S1P packs. My biggest<br />
model with an AXi 4120/18 which used to use 16 cells of 3000mAh NiMH drawing<br />
about 45A and driving a 14" x 9" propeller, now has 2 of the 3S2P packs in series<br />
in parallel with another 2 of the 3S1P packs in series, making the final formula<br />
6S3P giving about 24v.<br />
I have had to prop down to a 13½" x 7" to get down to the recommended 40A for the<br />
motor. Again the flying has been transformed by the weight reduction, increase<br />
in power and best thing safe flying time has gone up from 5-6 minutes to 10.<br />
Earlier this year I bought an Astro Lithium charger and test discharged all my<br />
packs to see what capacities they had. Only one was down, this pack had been in<br />
a full vertical dive crash and was somewhat "crumpled", with it's capacity now<br />
was down from 1600mAh to about 500mAh. The voltage was still normal and I<br />
had flown it for about 3 months albeit being aware of reduced performance.<br />
E.F.-U.K. 41
After a club works party (mowing and hole filling), I put the pack on a spade blade<br />
and with an extended lead shorted it out to see what would happen - I had fully<br />
charged it first - it was NOT impressive. After several seconds the lowest cell<br />
inflated then gave out a large amount of smoke but no visible flame. All went<br />
quiet for a bit then cell no 2 did the same - again smoke only. The 3rd cell seemed<br />
to take even longer to change and repeated the blowing up and smoking. It is<br />
possible that the reduced energy content contributed to the low key event but it<br />
gave me a lot more confidence in the safety of these packs.<br />
My rules now about use of LiPo are-<br />
As only one or two speed of my controllers have LiPo set cut-offs, I always fly<br />
with a timer set on the conservative side. I usually set a new aircraft up with<br />
a low time setting and see what recharge is necessary and up my timer with<br />
experience.<br />
Always charge up all LiPo packs as soon after flying as possible and thus avoid<br />
going to the field with an empty or partially charged pack and maybe overusing<br />
it in the air.<br />
I standardised all my connecters to Astro-zero loss-type. This followed from a<br />
couple of years ago having "Senior Moments" and connected two expensive NiCd<br />
packs to each other when I used the usual Gold connectors.<br />
I have tried using the Deans type connecters as these also cannot be wrongly<br />
connected. However I have found that soldering tidily is difficult without softening<br />
the plastic mounts and also shrink wrapping the terminal ends is necessary. The<br />
result is untidy and heavier. I also found that the connection was so tight as to be<br />
difficult to plug and unplug easily especially in a confined battery box space. I<br />
ended up stripping them all out of my models and giving them away.<br />
I have recently given away 16 packs of NiCds and NiMH batteries and sold 3 of my<br />
chargers. I have even re-geared the Eco 8 and fly that on the 3S2P packs. <strong>Flight</strong><br />
time is up, performance better and best there is no fade of performance as the<br />
battery discharges most of its energy content.<br />
One other thing - having seen a little Petrol generator driving a mains conversion<br />
power unit to drive chargers in the field I thought it a good idea, I bought one.<br />
Wrong move!! LiPo packs take so long to charge it is better to do it at home. Get<br />
another pack or two to increase number of packs available and on the field use lead<br />
acid as your fuel reserve.<br />
The lower charging rates of LiPo seems to punish the main battery less and I find<br />
that I do not run out of "Fuel" until I've had more than enough flying time and<br />
want an excuse to go home anyway!!<br />
Another charging innovation is to "Gang" up to 5 of my 1600mAh 3S packs even if<br />
they have been discharged to a different level. My Astro charger can give up to 8<br />
amps (I find 7.4amps on 3 cells seems the top). As the 1600 mAh packs will only<br />
42 E.F.-U.K.
safely accept 1.6A putting several packs in parallel enables the charger to<br />
simultaneously fill them all up. Any imbalances in the packs will even out as the<br />
lower voltage packs will take more current until they balance. I do charge in this<br />
case to the full voltage cut-off.<br />
(Editor: it is imperative that the maximum charge current for any single<br />
pack is not exceeded. If you charge cells or packs in series you need to<br />
reduce the charge current from the maximum stated to ensure that the<br />
lower voltage packs charge current is not exceeded.<br />
It is difficult to specify a safe limit in these circumstances but, if all the<br />
cells are the same capacity, 75% of the charge current should be OK.<br />
Where possible a lower current should be used.<br />
It is not recommended to charge different capacity (or even different types<br />
of cells with the same capacity) in parallel. If you must, the current needs<br />
to be set at a maximum of 75% of the current rating of the lowest pack,<br />
multiplied by the parallel cell count.<br />
Personally I do not buy packs of anything other than 1P, and connect<br />
packs in parallel and series as necessary to achieve the cell count and<br />
current rating I need.<br />
At home I normally charge at 75% of the rating of the pack, as there is no<br />
hurry and it is safer. With my 2 Schulze chamöleon chargers I can charge<br />
4 packs simultaneously if need be, although limited to 3S on the second<br />
outputs on each.<br />
If you want to check out the BEFA recommendations for LiPo cells, check<br />
out website at www.befa.org.uk/data-files/LiPo-Safety.pdf<br />
If you don’t have internet access, you can request a free copy by sending<br />
an A5 stamped addressed envelope to the Editor, address on page 4.)<br />
Charging time can be considerably reduced if you accept 80% charged packs which<br />
will still give full power but for a reduced flight time. The 80% point is reached<br />
when the charger goes over to Voltage regulated mode.<br />
Watch CofG positions when upgrading existing models. I have had to re-make the<br />
battery compartment in about 7 of my models to take into account the different<br />
shape and reduced weight of the LiPo packs.<br />
Have fun<br />
ps. Since the LiPo packs now come with "Balancer" module connectors I sent<br />
away (to <strong>Flight</strong>power) 6 of my older packs to have them retrofitted. I asked them<br />
to check for any imbalanced cells. They found NONE. Considering that the oldest<br />
packs have been used at least 3 or 4 times a week since last June it would suggest<br />
that at least with light handed use (less than full theoretical discharge rate) good<br />
packs do not get much out of balance.<br />
E.F.-U.K. 43
The Yorkshire Air Spectacular<br />
by John Thompson<br />
April 9th dawned wet and windy for the second annual trade show at this venue.<br />
Previous events had been at the Great Yorkshire Showground outside Harrogate,<br />
but substantial increases in the rents had enforced a change. The last time I was<br />
here was for the World Championships last year when the weather was again<br />
unkind for most of the week. York has its own little weather system, being in a<br />
valley, so it is often entirely different to other areas in the county.<br />
The traders were all set up in good time but the crowds were missing! The YAS<br />
had done us proud with the BMFA stand in an excellent position, and this year we<br />
had featured electric flight with the BEFA on the displays. My Micro-Bipe attracted<br />
some interest and most of the questions were about LiPo batteries, it is amazing<br />
the misinformation people have about them. Maybe tomorrow would be busier as<br />
we were (hopefully) electric flying outside. Last year it was the LMA flying but<br />
they were too far out for most people to bother with them.<br />
Saturday night and we were glued to the TV for the weather forecast, and it was<br />
much better, though a bit windy. Sunday morning a bright and sunny start with<br />
a car full of models. A respite from the BMFA stand to get some flying in.<br />
One of the Protech Ultimates<br />
44 E.F.-U.K.
Inside the hall<br />
E.F.-U.K. 45
Andy Johnson had organised the flight line, and the stalwarts from the Brighouse<br />
Club had provided a caravan and TX control, doing a grand job all day. Our flying<br />
area was the public enclosure beyond the track, and was in full view of the<br />
Grandstand. It was a little on the small side, and featured a brick clocktower in<br />
front, which seemed to dominate your vision whilst flying. We flew mainly single<br />
slots with the restricted space, and the grass was fairly long so only a few models<br />
were able to ROG from it. Initially the wind was along the track, but it soon<br />
moved around 90°, which meant it was blowing around the clocktower causing all<br />
sorts of turbulence.<br />
A good selection of models turned up, but some wisely did not attempt to fly in the<br />
wild conditions. Andy and his team put on a lively show cavorting around with<br />
their Protech Ultimates - we assumed the manoeuvres were intentional. Chris<br />
Martindale was flying several models for Puffin Models using AXi motors of course.<br />
My Micro-Bipe suffered a controller problem and the Slinger had developed a cracked<br />
motor mount during the journey. The Diabolitin (now with LiPo), however,<br />
performed as usual and even managed to ROG, and the motor didn’t fall off!<br />
With no rain we had an enjoyable days flying, it is a pity that the modellers did not<br />
support it in suitable numbers.<br />
It is a shame that when people go to such trouble to put on an event that so few<br />
bother to come. It is an ideal place to meet your old friends, but doubt if it will be<br />
repeated next year. (Editor: Maybe it is simply that flyers only want to go to<br />
events they can fly at?)<br />
A model Bell 47 helicopter flying in the hall<br />
46 E.F.-U.K.
A Protech Ultimate hovering in front of the clocktower<br />
A selection of the models<br />
E.F.-U.K. 47
A Tale of Two Twins<br />
by John Stennard<br />
Say 'twins' and one's thoughts usually move to 'twin engines' or 'twin wings' and<br />
not to 'twin rotors'. However I've recently been enjoying flying two very different<br />
but equally impressive electric 'twin-rotor' helicopters<br />
The most exciting of the two has got to be the MS CH-46 Sea Knight but this is<br />
closely followed by the diminutive but hugely enjoyable Hirobo XRB Lama. Both<br />
in different ways reflect just how far micro electric helicopters have come in very<br />
short time. The first really successful commercial design, the Piccolo from Ikarus<br />
started an interest in these small machines that has grown to quite amazing<br />
proportions. There are literally dozens of relatively easy to fly micro helicopters<br />
available and every time I test a new one it seems to be better than the last.<br />
Our regular winter indoor sessions have shown just how popular these helicopters<br />
have become and six flying at a time in just a one basketball sized gym has not<br />
been unusual.<br />
I am regularly involved in giving talks to model clubs on the subject of indoor RC<br />
and sometimes in a cramped, pub 'back-room', an electric helicopter is all that I<br />
can demonstrate, although this is changing now that so many model aircraft can<br />
also be easily hovered.<br />
I am always looking for something different for indoor flying and the CH-46 is<br />
certainly that. This twin rotor helicopter is a fine example of applying the latest<br />
technology to a very difficult concept. Basically this helicopter would be un-flyable<br />
without the assistance of the two gyros linked to a microprocessor. While I'm not<br />
going to look in detail at this helicopter a short overview will explain how it works<br />
and why it is both very<br />
fascinating and satisfying to<br />
fly.<br />
Starting with the mechanics<br />
the rotor heads are two<br />
collective heads as used on<br />
the MS Hornet helicopter.<br />
These are mounted at either<br />
end of an aluminium and<br />
glass-board chassis. Each<br />
rotor head uses 3 servos that<br />
plug directly into the<br />
microprocessor unit and leads<br />
from the processor plug into<br />
the receiver.<br />
The forward gearbox and double-ended Twister motor<br />
48 E.F.-U.K.
The motor used is a double<br />
ended Twister brushless<br />
outrunner with a special<br />
controller that controls both<br />
motors and provides the BEC<br />
output. The front rotor is<br />
connected directly to the motor<br />
via a bevel gear while the rear<br />
is connected via an extension<br />
shaft and identical gear system.<br />
The two 'pilot authority' MS<br />
gyros also plug into the Rx and<br />
processor. These gyros regulate The motor, rear rotor drive shaft and control board<br />
the pitch and yaw of the cyclic.<br />
A seven channel MS receiver does all the work and all channels are used.<br />
Power is supplied by a Lithium Polymer pack and after experimented with packs<br />
ranging between 1500 and 2500 mAh I found that the 3S1P Kokam 1500 and<br />
Polyquest 1700 give at least 15 minutes flying time.<br />
Building the CH-46 was easy but setting it up was rather difficult and could not<br />
have been done without the help of Roger Hamilton at Skyline Models, the MS<br />
distributors. The problem was that the setting up requires a high degree of channel<br />
mixing because of the different head angles and flight characteristics. The motor<br />
control also requires to be set for a constant speed so that the throttle stick really<br />
only controls the blade pitch.<br />
The completed mechanics in flight<br />
E.F.-U.K. 49
First flights were done without the body in place and I quickly found that the CH-<br />
46 was actually very in stable in roll but it needed the gyro controls to be set to<br />
their maximum for pitch and yaw The pitch control was particularly sensitive<br />
and eventually I dialled in 35% negative expo. Once all the adjustments had been<br />
made and confident that I could handle the model I fixed one half of the body in<br />
place. Flying a more 'solid' model proved to be easier and I was soon flying circuits<br />
and nose in hovering.<br />
My euphoria was quickly deflated when I suffered a blade strike. The rotors are<br />
set to intermesh and the locating pin on the front rotor had come out. This had<br />
allowed the front rotor to slip on its shaft and the blades had touched. I subsequently<br />
found that these pins need to be 'locked' in place with a dab of epoxy to avoid any<br />
possibility of this fairly disastrous situation occurring.<br />
The next stage was to add the other half of the body and the model was now<br />
extremely realistic from both sides. It also stopped comments like 'can't you afford<br />
the other half'!<br />
Once confidence has been gained the CH-46 is not at all difficult to fly. It is<br />
extremely steady in the hover and even pirouettes nicely. One big advantage is<br />
that there is no tendency to roll due to the stability given by the opposite rotating<br />
rotors. The yaw control is very effective and not overly sensitive to control inputs.<br />
The pitch however is a different matter and is very sensitive. This is no doubt due<br />
to the fact that both rotors tilt forward and back together so the control is<br />
particularly effective. While clearly not for the novice anyone who can fly circuits<br />
and hover 'nose-in' could fly this model.<br />
The CH-47 complete with both body shells<br />
50 E.F.-U.K.
John flying the completed CH-47<br />
The CH-46 could definitely lift an underslung load and it's something I want to try<br />
having already done it on the next twin-rotor, the Hirobo XRB Lama.<br />
The umbilical-cord version of this model has been around for some while so it was<br />
no surprise when Hirobo introduced an RC version. This model is a very different<br />
concept as it uses contra-rotating blades powered by 2 high quality coreless motors.<br />
The Hirobo XRB Lama<br />
E.F.-U.K. 51
Hirobo really have produced<br />
a delightful little scale model<br />
which in spite of the twin<br />
rotors looks very realistic in<br />
flight, in fact one tends not to<br />
notice the rotor situation<br />
when the model is flying.<br />
I bought the version without<br />
the TX from Model Aviation<br />
Ltd. The Lama actually has<br />
a 'dial-in' setting for different<br />
makes of transmitter. This<br />
also detects whether the TX<br />
is set for mode 1 or 2.<br />
A close-up of the detail on the Lama<br />
This is a great feature as I've<br />
popped my TX Xtal into the mode 2 transmitters of several friends and they have<br />
been able to take a turn with my Lama.<br />
The Lama comes with a 2S1P 720 LiPo pack and charger with a 'dedicated'<br />
connector. My first job was to make up a 'patch' lead so that I could use my own<br />
740 LiPo packs that are fitted with Deans micro connectors. I also found that<br />
Puffin Models have an excellent E-Tec 2S1P 700 pack that is a perfect fit in the<br />
integral battery tray. All the battery packs give 15 - 20 flight duration.<br />
The Lama in flight<br />
52 E.F.-U.K.
The Lama uses contra-rotating rotors each driven by its own coreless motor. The<br />
upper rotor blades purely rotate and provide lift while the lower have a full cyclic<br />
action via two special integral servos. Yaw control is achieved by controlling the<br />
individual rotor speeds and the integral gyro provides an exceptionally stable hover<br />
using the same method.<br />
Height control is established by increasing the speed of both rotors simultaneously.<br />
Roll and pitch are provided via the cyclic servos. All these work together to provide<br />
quite amazingly precise and accurate control. You really can fly this model in a 1<br />
m square space, or 1m3 if you like!<br />
The Lama comes equipped with two different flybar weights. The heavy set make<br />
the model fly in such a stable manner that is actually quite hard to get it the<br />
respond to control inputs. However when fitted with the lightweight paddles it is<br />
far more responsive and can be flown in a relatively dynamic manner.<br />
Many of the standard helicopter manoeuvres such as pirouettes, circuits and nosein<br />
hovering are clearly easier to fly with the 'built-in' level of stability but still<br />
have to be learnt.<br />
Once the basic handling techniques have been acquired circuits can be flown at a<br />
surprisingly high speed considering the top rotor is always try to stabilise the<br />
Lama and insist on it hovering!<br />
Included with the Lama are two sets of 6 spare blades. These are required even if<br />
you are an experienced<br />
flier as they are made of<br />
a Depron type material<br />
and designed to break<br />
easily. This avoids any<br />
damage to the rotor head<br />
parts.<br />
While most of my flying<br />
with the Lama has been<br />
done indoors it can be<br />
easily flown outdoor in<br />
zero wind conditions.<br />
However it is very<br />
sensitive to any wind<br />
and difficult to control in<br />
even a light breeze.<br />
Two things I have done<br />
with my Lama are to<br />
equip a second body with<br />
a red, a green and two<br />
An example of the load lifting capability<br />
blue flashing LEDs<br />
E.F.-U.K. 53
powered by a single 40 mAh LiPo battery and to experiment with load carrying.<br />
The underslung load carrying has been very successful and releasing is easy but<br />
actually picking the load up in flight is more difficult.<br />
There is no doubt that the Lama concept particularly suits modellers who are<br />
fascinated by helicopters but severely doubt their ability to fly one. Once trimmed<br />
a take off and perfectly stable hover can be achieved by just using the throttle<br />
control and it will continue to hover 'hands-off'.<br />
While more skills have to be learnt to really fly the Lama around some of the<br />
initial problems have been removed. As far as I am concerned it is the best 'fun'<br />
helicopter that I have ever flown and the only one I have flown around the lounge.<br />
Be careful though as the downwash from two sets of blades can quickly destroy<br />
flower arrangements and rearrange any other loose items in your lounge!<br />
Similar versions from other firms are available from Paul Gunn at<br />
www.liteheli.com<br />
<strong>Electric</strong> helicopters are more popular than ever and it's easy to see why when they<br />
are so attractive and fly so well.<br />
<strong>Flight</strong> outdoors is also possible in calm conditions<br />
54 E.F.-U.K.
The 51st Toledo RC Exposition<br />
by Raymond J. Foley (rayfoley@earthlink.net)<br />
The 51st Annual Toledo Radio Control Exposition was presented by the Weak<br />
Signals RC Club on April 1-3, 2005 at the Sea Gate Center in downtown Toledo,<br />
Ohio, USA. I have attended this show yearly since 1969 and have watched the RC<br />
hobby evolve in ever fascinating ways. Digital proportional was relatively new in<br />
1969 but now the features and programmability of the computer based radios is<br />
mind boggling and also pretty easy.<br />
My area of interest is e-flight but I am totally amazed by the gas turbine jets, the<br />
giant scale airplanes, the sailplanes, and so forth. Being an electrical engineer I<br />
was drawn to some interesting leaps forward in electronic stuff.<br />
Castle Creations was showing prototypes of ESCs which are for really serious<br />
motors like the F5B welder motors and the 1/4 scale airplanes and up. The ratings<br />
were astounding by any measure. There were three controllers in the family.<br />
The first unit has 50v rating with 90A surge and 45A continuous. The second<br />
unit has 50v rating with 140A surge and 85A continuous. The third unit has 50v<br />
rating with 200A surge and 110A continuous. The units have 10 AWG (~12 SWG)<br />
stranded wire to carry all this current.<br />
The units have a common interface board and 1, 2, or 3 MOSFET power boards in<br />
parallel. Each power board has 36 MOSFETs to carry the current load. Liberal<br />
use of heatsinks to spread and dissipate the heat was observed.<br />
Castle Creations prototype 50v 45A, 90A and 135A controllers<br />
E.F.-U.K. 55
The very large AXi, Plettenberg, Neumotors, Torcman, etc., motors finally have<br />
serious industrial strength controllers for improbably large airplanes. They are<br />
also Phoenix Link compatible. A Castle Creations teaser for the future, 85 to 100v<br />
ratings, 150A surge, and 120A continuous, that's 10 kW to 12 kW (13HP to 16HP).<br />
Good Lord, what next? More info at www.castlecreations.com<br />
I found a nifty little device from Winged Shadow Systems called the RC Reporter.<br />
This 5g device plugs into any spare servo channel and mounts in the airplane. If<br />
you lose your airplane in high crops, the piezo speaker will loudly play a tune to<br />
help you locate the errant plane. If the radio signal is lost, it will play its tune<br />
loudly. There is also a volt meter function for monitoring the receiver battery<br />
voltage which is very cool.<br />
But the neatest thing it does is keep a total of glitches which occur during a flight<br />
which you can monitor after landing. By the way if you prefer there is a<br />
programming device which lets one download phone ring tone files to customize<br />
the sound. Imagine Wagner's "Valkyres" coming forth from your scale Huey, how<br />
apocalyptic! More info at www.rcreporter.com<br />
The RC Reporter guy and his products<br />
Eagle Tree Systems showed their Seagull system which is a real time information<br />
down link and readout. The airborne system can monitor voltage, rpm,<br />
temperature, current, wattage, g-forces and many others.<br />
56 E.F.-U.K.
The LCD readout is mounted on your TX antenna and you can choose what<br />
parameters you want displayed in real time. The flight data can also be downloaded<br />
to your computer for analysis and graphical display. This would be great for<br />
turbine applications and high power electrics. Further teaser: GPS capable. More<br />
info at www.eagletreesystems.com<br />
Screen shots of the Eagle Tree systems down link and real time display<br />
The people at Startek Systems were showing a real time video downlink system in<br />
colour no less! You mount a miniature video camera and downlink transmitter in<br />
the airplane and connect the receiver to a TV, VCR, or computer to view the flight<br />
from the left seat in real time. The picture of a working system shows yours truly<br />
taking the picture. How terribly cool! More info at www.smartek.com<br />
Yours truly in he display of the Startek Systems video downlink<br />
E.F.-U.K. 57
Dan Schwarz at FoamFly.com has recently perfected<br />
his computer controlled foam cutting machine and is<br />
delivering some amazing foamy indoor and outdoor<br />
models and accessories. The photo shows his profile<br />
DC3/C47 twin and his foamy wheels as well as a 50p<br />
coin for scale. His model called "the Frog" is made of<br />
light green foam and flies great. The "Flying Shark"<br />
model must be seen to be believed. He also supplies a<br />
full line of GWS motors and other small e-flight stuff.<br />
More info at www.foamfly.com<br />
The Foam Fly DC3 / C47 profile foamy twin<br />
Azarr at E-cubed RC was showing his "Antenna-Lite" replacement antennas for<br />
indoor and not necessarily close in outdoor flying. I use these amazing antennas<br />
and have had no problems with reception during the winter indoor season. The<br />
"Antenna-Lite" is modestly priced and is available for North American and European<br />
frequencies. Azarr also supplies a full line of APC propellers and brushless motors<br />
and controllers. More info at www.e-cubedrc.com<br />
The good folks at West Mountain Radio were demonstrating their Computerized<br />
Battery Analyzer and their Rig Runners. The CBA is used to test virtually any<br />
battery at real world loads and graph the result in real time when connected to<br />
your PC via an USB cable.<br />
The Software to drive the CBA plots the discharge of a battery versus time and can<br />
save the test results, overlay the test results with previous tests to look for<br />
improvements or degradation in performance of the battery. You can also plot the<br />
58 E.F.-U.K.<br />
Foam Fly foamy wheels
esults to your printer for<br />
hard copy and a host of other<br />
amazing features. The Rig<br />
Runners are dc power<br />
distribution hubs with<br />
internal protection circuitry<br />
and automotive type fuses for<br />
each of the multiple outlets.<br />
The system is built up around<br />
Anderson Power Poles for<br />
easy connection of your supply<br />
and dc devices like chargers,<br />
cooling fans ala Bob Kopski's<br />
Big Blow or whatever you<br />
have that uses 12vdc. Screen capture showing several battery tests overlaid<br />
I use one of the 6 outlet versions and it really has reduced the wiring clutter on the<br />
building table. More info at www.westmountainradio.com<br />
There was so much to see and so many vendors at the Toledo Show that one could<br />
write a book, but you know publishers. Tut tut. The scale airplanes were amazing.<br />
There was a 50% scale Gee Bee with a two cylinder gasoline engine and a prop<br />
which costs more than most of my airplanes, outstanding.<br />
There was a stand off scale Boeing 747 with a space shuttle mounted on top,<br />
engines in the pylons not turbines, about a ten foot wing span and eight foot<br />
length, stupendous. The quarter scale and larger were a dominating presence<br />
with show stopping finishes which I can't imagine painting, and would be wary to<br />
fly. These are real budget buster airplanes but astounding. There was one that<br />
had four geared Hacker Motors belt drive reduced to a 30" propeller, four ESCs,<br />
four huge LiPo batteries, and untold servos and complex electrical system, mind<br />
boggling but wonderful. The sailplanes were truly exquisite, long skinny wings<br />
that just demanded a winch. The foamy profile planes were available is so many<br />
styles and colours and sizes<br />
it would be impossible to<br />
recount. New small brushless<br />
motors seemed to pop up like<br />
mushrooms wherever you<br />
looked. War planes, acrobatic<br />
planes, boats both scale and<br />
racing, the list goes on and<br />
on. If you ever get a chance<br />
to come to The Toledo RC<br />
Exposition, you won't go away<br />
disappointed, overwhelmed<br />
An excellent 1/2 scale Gee Bee racer<br />
maybe, but not disappointed.<br />
E.F.-U.K. 59
Hints & Tips<br />
An occasional series of useful ideas<br />
A couple of different ideas from Clay Ramskill, Arlington, Texas.<br />
Antenna Keeper<br />
What do you do to keep the<br />
end of your antenna in place?<br />
A short (1/2” / 12mm) piece of<br />
fuel tube does the job nicely -<br />
cut two slots in it about 1/2<br />
way through.<br />
Squeeze the tubing to open up<br />
the slots, and thread the<br />
antenna through the slots as<br />
shown right. The tubing can<br />
then be slid up the antenna<br />
as desired.<br />
The tubing will not beat your aircraft to death as the antenna whips around in<br />
flight, will hold the antenna securely, and yet in case of (ugh!) a crash, the tubing<br />
will slide right off instead of breaking the antenna.<br />
Building Light<br />
Okay, so we all know that we want our planes to be as light as possible. How do<br />
we do that, especially with a kit already in hand?<br />
WOOD<br />
The first and primary rule is do NOT use heavy wood!!! Select your wood at the<br />
hobby shop. Get good, straight grained balsa pieces and compare the, then buy<br />
the lightest. If you buy mail order, get contest balsa (4 to 6 lb./ft3 / 64 to 96 kg/m3 )<br />
or "light" (6 - 8 lb./ft3 / 96 to 128 kg/m3 ) wood and hope for the best. With a kit, you<br />
may have to throw out some wood and replace the heaviest with lighter stock.<br />
GLUE<br />
Use light glue - CA is the best for the weight, aliphatics come next, and epoxies are<br />
the worst. Where you feel you must use epoxy, such as on your firewall or landing<br />
gear blocks, use as little as possible.<br />
PLY<br />
Plywood is heavy, but necessary in some spots - firewalls, landing gear plates, and<br />
some formers need to be ply. But use it sparingly, substituting lite ply or even<br />
balsa ply if you can. But where bolts are involved, you should use aircraft ply.<br />
60 E.F.-U.K.
Even using the ply, we can shave some weight. For instance, 3/16" (4.8mm) ply is<br />
enough for most firewalls and landing gear plates - throw out the 1/4" (6.4mm).<br />
Further, use the strength of the engine mount. If it's a one-piece mount, you don't<br />
need the wood inside the bolt pattern. Cut it out, stuff the hole with balsa. The<br />
same goes for a plate for mounting landing gear.<br />
Wing mounting blocks can be cut down - moving the bolts back an inch may allow<br />
you to cut an inch off the front of the blocks.<br />
Ply formers can usually be trimmed from the inside, ply fuselage sides can usually<br />
stand larger lightening holes.<br />
CUT AND CHOP<br />
Lightening holes can be cut in balsa fuselage sides and on the top (you may want<br />
to keep the fuselage bottom solid. Thinner balsa may often be used for top and<br />
bottom cross-grain planking. Hollow or eliminate large blocks, such as are often<br />
supplied for wingtips.<br />
BUILD UP<br />
Ailerons, rudders, and fins/stabs may be heavy 1/4" - 5/16" (6 to 8mm) solid balsa.<br />
Building these up from 1/16" (1.6mm) balsa skins with trusswork interiors gives<br />
you a light, stiff structure, perhaps even stronger than the originals. Building up<br />
these surfaces may also be preferable to using the original solid wood with lightening<br />
holes. Skinned "built up" structures are considerably stiffer than open frame<br />
construction, but not as light.<br />
E.F.-U.K. 61
FOAM WINGS<br />
Foam wings can also be improved upon. Note that using light wood for wing skins<br />
and minimal glue applies here, too.<br />
Consider that the actual bending loads on the wing are greatest at the centre,<br />
ranging down to near zero at the tips. So strength can be tapered off as we go out<br />
to the tips. Skin and foam may be cut away increasingly progressing outboard<br />
toward the wingtips; this is best done behind the thick point on the wing.<br />
BUILT-UP WINGS<br />
The same principles apply; strength (and weight) can be cut out near the tips.<br />
Spars can be of thinner stock. Gradually cut the thickness of the webbing to 1/32"<br />
(0.8mm) out at the wingtip.<br />
Note: The above is fine for flight conditions - but if you "catch a wingtip" on landing,<br />
that's another story!<br />
COVERING<br />
Not all coverings weigh the same! The low-temperature Mylar is lighter - fabric is<br />
heavier. Even among the "standard" coverings, the weight varies - Monocote is<br />
lighter than Ultracote, for instance. Colour also makes a difference - lighter colours<br />
are heavier! It takes less pigment to colour something black than white! And<br />
don't have any large overlapping areas on your covering, that's just added weight!<br />
SANDING<br />
Can anything be simpler? The more you sand, the less your plane will weigh!<br />
Obviously, this could be overdone - but at least sand in curved corners when they<br />
are shown on the plans. That sawdust may not seem like much weight, but it all<br />
adds up.<br />
BALANCE<br />
DO NOT ACCEPT adding any lead to a plane! The exception is an ounce or two in<br />
the wingtip to balance laterally.<br />
62 E.F.-U.K.
Move servos, battery, and even the engine to avoid adding lead to your plane.<br />
Bolted or glued in lead is unnecessary weight - and adds extra loads to your airframe.<br />
Scale builders may be stuck with this - quite often scale planes tend to be heavy<br />
anyway; adding lead becomes the "last straw" leading to the stall, snap, crash<br />
tendencies of some of those planes.<br />
EXOTICA<br />
There are more exotic measures taken to save weight - usually in larger, more<br />
complex aircraft. Modellers use aluminium, Carbon and Boron fibre, expensive<br />
honeycombs, and Kevlar to increase the strength-to-weight ratio. All this stuff is<br />
expensive, but worth it when performance is the prime consideration.<br />
SAFETY<br />
You must keep in mind that whenever you make changes to a design specification,<br />
YOU are now responsible for the aircraft's integrity.<br />
Most model designs are heavily overbuilt - but it's always going to be up to you to<br />
decide what is overbuilt and what isn't. We're not rocket scientists (and neither<br />
are the designers!), so don't be afraid to ask an experienced modeller (preferably<br />
several!) about modifications that you're not sure of.<br />
Don't be reluctant to experiment! If a ply former seems heavy, try making a<br />
duplicate of balsa ply, and compare. Try doing a built-up stab (they're easy, really!)<br />
and compare weight and stiffness with the solid version.<br />
FINAL THOUGHT<br />
Keep weight in mind constantly as you build. Would EZ hinges be lighter than<br />
the conventional hinge-pin type? Can I use shorter (lighter) bolts than the ones<br />
the kit supplied? Is this piece of balsa too heavy?<br />
An ounce here, a half-ounce there - it all adds up!<br />
E.F.-U.K. 63
<strong>Electric</strong> <strong>Flight</strong> Calendar<br />
If you would like details of your event to appear in these pages please send full<br />
details to the Editor EF-UK, contact details on page 4. Please bear in mind that<br />
this magazine is quarterly so ensure that the details are sent in good time.<br />
For last minute information on events please check out the events list on the<br />
BEFA website (www.befa.org.uk).<br />
Dates, times and, even, locations of events can change at the last minute. You are<br />
strongly advised to check on events with the given contacts before setting out on<br />
your journey to any event.<br />
All BEFA flying events require proof of BMFA (or equivalent) insurance<br />
and an ‘A’ Certificate to fly. For flying fixed wing models, any of the fixed<br />
wing ‘A’ certificates are acceptable. For helicopters, a helicopter ‘A’ certificate will<br />
be required.<br />
All flying models must have been satisfactorily flown at least twice<br />
before flying at a BEFA event - NO TEST <strong>FLIGHT</strong>S ON THE DAY.<br />
July 2005<br />
2nd BEFA ElectroSlot & E400 League Event at Middle Wallop. Details<br />
from Bob West at robertj.west@tesco.net or 07970 238 704<br />
2nd - 3rd BEFA Festival of <strong>Flight</strong> at Middle Wallop. Yet again JéPé has<br />
confirmed attendance and hopes to bring more speed freaks this time.<br />
We have managed to negotiate a reduction in the entrance fee this<br />
year, which will be £6 per person, per day. At the time of writing it is<br />
still to be confirmed, but it is likely that fly-in pilots will only have to<br />
pay the field entrance charge. For up to date details see<br />
www.befa.org.uk or call Jan Bassett (Editor, see page 4).<br />
3rd Ebor <strong>Electric</strong> Fly-In at York Knavesmire (racecourse). For more<br />
info ask Mike Proctor at mike@mproctor.demon.co.uk on 01904<br />
489 386 or Eric Leadley on 01904 422 615.<br />
9th - 10th Sandhays Scale Gliding <strong>Association</strong> <strong>Electric</strong> Fly-in. The<br />
location is near Bishop Norton, Lincolnshire (OS Land Ranger Grid<br />
Ref TF021932). Proof of insurance required. Entry fee £3 per pilot<br />
per day or £5 for both days. For more details contact Gordon Veal by<br />
email at wgveal@globalnet.co.uk or phone on 01673 842 581<br />
16th - 17th Model Expo 2005 at the NEC, Birmingham. It has been confirmed<br />
that the BEFA will be at the show again this year, see you there.<br />
64 E.F.-U.K.
July 2005 (continued)<br />
10th You are invited to attend the first E-Soaring 200 event at Wetlands<br />
(near Retford). Only channels 56, 58, 60, 62, 64, 66, 68 & 70 are<br />
available. It is anticipated that a second event will be held in the<br />
Autumn and will incorporate any changes to the rules which this<br />
event might highlight.<br />
This event has been developed by members of the BMFA Silent <strong>Flight</strong><br />
Technical Committee over the past year in an attempt to produce an<br />
<strong>Electric</strong> Soaring class with potential for FAI adoption. Click here for<br />
the basic rules. For more details or to enter please email Mike Proctor<br />
at mike@mproctor.demon.co.uk<br />
17th PANDAS (Pontefract & District Aeromodellers) Grand <strong>Electric</strong> Fly-<br />
In at Pontefract Racecourse (not Park entrance, junction 32, M62,<br />
few hundred yards south, right into white gates, then right again to<br />
site). 10 am to 5 pm. BMFA Insurance essential. All legal frequencies.<br />
Sorry no overnight camping. Free aeromodellers boot sale. Traders<br />
welcome. Contact John Thompson on 01924 515 595 or<br />
Johnty99@ntlworld.com for information.<br />
24th BEFA ElectroSlot & E400 League Event at Leamington Spa.<br />
Contact Bob West at robertj.west@tesco.net or 07970 238 704<br />
24th Bath SpaRCS All <strong>Electric</strong> Fly-In at RAF Colerne, Wiltshire.<br />
Airfield site with grass & tarmac runways. No competitions. Proof<br />
of BMFA insurance required. Regret no facilities for spectators. Pilot's<br />
brief at 10am. Contact Bob Partington on 01225 891 441 or email at<br />
bob.partington@ukonline.co.uk for more details.<br />
August 2005<br />
7th BEFA Fly-In at North Leamington School, Royal Leamington<br />
Spa.<br />
14th BEFA ElectroSlot & E400 League Event at York. Contact Bob<br />
West at robertj.west@tesco.net or 07970 238 704<br />
27th - 29th BMFA <strong>British</strong> Silent <strong>Flight</strong> National Championships. The<br />
ElectroSlot and E400 events at this years Nationals will not count<br />
towards the BEFA league event scores.<br />
28th The 13th international RMVC Cumulus <strong>Electric</strong> fly-in & DIY<br />
e-motor meeting in Winssen near Nijmegen in the Netherlands.<br />
For extensive information about the event and location see their website<br />
at http://home.hetnet.nl/~ronvans/<br />
E.F.-U.K. 65
September 2005<br />
4th BEFA Fly-In at Cranford Park, Hayes (just off J3 of the M4).<br />
This event is provided with the kind cooperation of the Hayes & DMAC<br />
and Cranford Park. For more information contact Dave Chinery at<br />
DavidDchinery@aol.com or on 020 8573 4687.<br />
10th BMFA Northern Area presents the Annual Pudsey Swapmeet and<br />
Indoor Fly-In. Swapmeet doors open 8.30 close 12.00 noon.<br />
Admission free - one free table per BMFA member. Flying 12.30 to<br />
5.00 pm in alternate Free <strong>Flight</strong> and RC slots of 30 minutes each.<br />
Free flight. Low key competitions for Scale (rubber, CO2, or<br />
electric), Foam 2000 / Butterfly; Civic / Mini Hangar Rat / Mini<br />
Gyminnie Cricket; & Dart. Details from John Godden on telephone<br />
0113 252 1002.<br />
Lightweight RC. BMFA members only. Due to the sensitive nature<br />
of this venue, only slow flying models up to 160g allowed. More<br />
from John Thompson at johnty99@ntlworld.com or on telephone<br />
01924 515 595<br />
10th - 11th Control-line Carrier Deck Event at the Pontefract and District<br />
Aeromodellers flying site, Pontefract Racecourse, Pontefract Park<br />
Junction 32 of the M62, Yorkshire.<br />
Great fun, have a look and possibly a go on Saturday. Sunday is the<br />
main competition day with results counting towards the ‘Merco Cup’<br />
competition. Contact Stuart Oddy on 01924 493 424 or Trevor Jones<br />
on 01924 820 175<br />
11th BEFA ElectroSlot & E400 League Event at Wetlands. Contact<br />
Bob West at robertj.west@tesco.net or 07970 238 704<br />
11th The Ray Holt Scale Fly-in at the Pontefract and District<br />
Aeromodellers flying site, Pontefract Racecourse, Pontefract Park<br />
Junction 32 of the M62, Yorkshire.<br />
The Ray Holt Trophy for best placed Pontefract member. Classes for<br />
Large Monoplane, Small Monoplanes, Large Biplane and Small<br />
Biplane Contact Trevor Jones on 01924 820 175, or Tony Waite on<br />
01132 866 371<br />
18th Pillerton Hersey <strong>Electric</strong> fly-in courtesy of John Lewthwaite.<br />
Proof of insurance is required. For more information contact John<br />
on 01789 740 688<br />
25th BEFA ElectroSlot & E400 League Event at Pillerton Hersey.<br />
Contact Bob West at robertj.west@tesco.net or 07970 238 704<br />
66 E.F.-U.K.
October 2005<br />
2nd Unlimited Scale Competition at the Pontefract and District<br />
Aeromodellers flying site, Pontefract Racecourse, Pontefract Park<br />
Junction 32 of the M62, Yorkshire. F4C flying schedule, low-key<br />
static element. Contact Philip S Kent on 01274 873 069<br />
November 2005<br />
6th BEFA Technical Workshop at the Royal Spa Centre, Royal<br />
Leamington Spa, Warwickshire. More information in the next issue,<br />
or check out the BEFA website.<br />
FOR SALE / WANTED<br />
Member's Sales & Wants<br />
For Sale by Ken Paulson. For more information contact Ken on 01332 881 584.<br />
• Futaba FF8 Transmitter with manual, carry case & neck strap -<br />
all in very good condition, price £120.<br />
• Graupner Speed 600 7.2V with Kruse Synchro-Gear belt drive 2.25:1,<br />
Teutonic Perfection - £25<br />
• Master Airscrew gearbox with 7.2v 600 motor, only £10<br />
Neil Stainton is selling the following items. All are plus postage or can be picked<br />
up from Leamington Spa. Contact Neil Stainton on 01926 314 011 or email him at<br />
Neil@ITpartnership.com<br />
• Schulze 6-636+ 8A charger for 1-36 NiCd / NiMH cells & 1-11 LiPo cells.<br />
V8 software: £179<br />
• New Blade Runner indoor helicopter, including 27Mhz R/C, LiPo<br />
battery & charger: £49<br />
• Hornet Helicopter FP VGC, with carbon blades: £35<br />
• GWS PG03 gyro: £19<br />
• Blue Arrow 4.3g servos, new, boxed £8.95 each<br />
• Blue Bird 3.4g quality micro servos with coreless motor £11.95 each<br />
Dennis Hey is selling CD-ROM motors £ 2.00 each, or 2 for £3.00, postage<br />
included. Contact him at dennis@hey13.freeserve.co.uk or 01943 862 761.<br />
Wanted: A Mini Laser 3D kit preferably not started, but a built model in good<br />
condition also considered. Contact Gareth Hodges on 01873 830 808 or email him<br />
at Gareth.Hodges@btopenworld.com<br />
E.F.-U.K. 67
Neil Stainton wants a Simply the Best 1.8 - whole model or wing only, in<br />
any condition. Contact Neil at Neil@ITpartnership.com or on 01926 314 011<br />
Gareth Hodges wants a Hacker B20-15L and 4:1 Gearbox, must be in good<br />
condition. Call Martin on 01873 830 808 or at Gareth.Hodges@btopenworld.com<br />
For Sale by Martin Collins. Call 01908 583 545 or<br />
email kartman.nascar24@btinternet.com. Can<br />
be collected from Milton Keynes<br />
• KYOSHO T-33 in Thunderbirds aerobatic<br />
colours. Comes with the motor & fan unit<br />
installed (I was told it was a WeMoTec fan but<br />
I cannot confirm it). Good condition apart from<br />
a couple of missing decals. Price £60 (no offers).<br />
• RIPMAX ARTF SPITFIRE fitted with AXi 28/<br />
20/10 and model motors brushless controller.<br />
The Spitfire has 2 mini servos in it (aileron/<br />
elevator) and comes with an 8 cell 2400 Sanyo<br />
pack and 11" x 7" propeller. Just fit your<br />
receiver to make it a flyer, selling due to house<br />
move and other projects it has only 6 flights<br />
from new on it, price is £200<br />
The items below are for sale by Trevor Wain, contact at trevorwain@tiscali.co.uk<br />
or on 01332 792 508.<br />
• Puffin Models Elegant, 2.6m glider / electric glider. Flown twice, but<br />
other interests took over - no equipment fitted. Offers around £100.<br />
• Kontronik Smile 40-6-18 opto, brushless, speed controller, 40A 6-<br />
24V with Kontronik 4mm silver connectors on the output and Schulze 3.5mm<br />
connectors on the input and has been used twice. He would like to exchange<br />
for the same or very similar with BEC or sell for £65.<br />
Wanted, by the Editor, any of the following:<br />
• General / Technical Articles or Hints & Tips.<br />
• Product Reviews, New products & items of interest.<br />
• <strong>Electric</strong> <strong>Flight</strong> Event write-ups.<br />
• Photographs of your models.<br />
Please send Digital photos or photographic (6” x 4” or bigger) prints to the editor.<br />
Photographic prints supplied will be returned, unless specified otherwise, if you<br />
supply a return address. Digital photos should be sent at the highest resolution<br />
possible, in colour, and uncompressed or low compression. Please do not send<br />
inkjet prints as too much quality is lost. Please send as many details of models as<br />
possible but at least span, power train, battery used & flight performance please.<br />
68 E.F.-U.K.
New to <strong>ELECTRIC</strong> <strong>FLIGHT</strong>?<br />
START HERE . . . . .<br />
You may be taking up <strong>Electric</strong> <strong>Flight</strong> for the first time or you may be converting<br />
from another discipline. Whatever your situation, help and advice is available.<br />
BEFA has prepared an information sheet which details further sources of<br />
information which you may find useful when just joining the hobby. To receive a<br />
copy, please send a Stamped Addressed Envelope (S.A.E.) to Robert Mahoney,<br />
address on page 4.<br />
BEGINNER'S GUIDE<br />
A Beginner’s Guide to <strong>Electric</strong> <strong>Flight</strong> is available, which explains many of the<br />
‘Mysteries' of <strong>Electric</strong>s’ and will, hopefully, set you off on the right foot. Please<br />
send £3.00 per copy required to The Editor of EF-UK at the address on page 4.<br />
Please add £1.00 extra for overseas postage and remit in Sterling. Cheques should<br />
be made payable to BEFA.<br />
TECHNICAL HELP SERVICE<br />
Technical help is now available again for the use of all members. We regret that<br />
no telephone service is available, but all questions in writing (or email) will be<br />
answered by our Technical Liaison Officer (TLO). Please refer your queries to our<br />
TLO, to the postal or email address on page 4. If sent by post, please ensure that<br />
you include an S.A.E. for a reply.<br />
CONNECTIONS SERVICE<br />
Requests are frequently received from members who wish to be put in contact<br />
with other members living in the same area. The easiest method of doing this is<br />
to place a free 'wanted' advert in the classified section of this magazine.<br />
Alternatively, a request may be made IN WRITING to the Membership Secretary<br />
who is allowed to divulge such information to members ONLY. Please supply as<br />
much information about your location as possible and please remember to include<br />
an S.A.E. for your reply.<br />
B.E.F.A. MEMBERSHIP<br />
Membership of the <strong>Association</strong> is open to all. Those who are not members of<br />
BMFA (our national controlling body) will have a subscription to EF-UK membership<br />
with none of the other benefits. Overseas members are very welcome and will be<br />
classed as full members if they belong to their own national controlling body.<br />
CONTACT<br />
For full details, please send an S.A.E. to the Membership Secretary (address on<br />
page 4) requesting a membership application form. Those with Internet access<br />
may visit the B.E.F.A. website at www.befa.org.uk where you will find all the<br />
membership information you should require and a application form.<br />
E.F.-U.K. 69
70 E.F.-U.K.<br />
B.E.F.A. Sales<br />
BEFA Round, Coloured Rub-down Decals - Ultra-thin & light - 50p each<br />
EF-UK Back Issues - Issues 71 to 73 and 75 to 77 are available to BEFA members<br />
at £3.00 each, or £5.00 each to non-members. These prices include UK P&P,<br />
overseas rates on application. Reprints of earlier issues may be available to special<br />
order, contact the Editor for details (see page 4).<br />
EF-UK Index. A comprehensive index of EF-UK, from issue 28 to date, is available<br />
by sending a £1 coin to cover copying and postage cost.<br />
Binders:- are available to hold 8 to 12 issues of <strong>Electric</strong> <strong>Flight</strong> U.K. Produced in<br />
dark blue with gold lettering on the spine, these cost £4.50 each including U.K.<br />
postage. Please add £1 for European postage and £2 for Worldwide postage.<br />
Please send all orders to The Editor of EF-UK at the address on page 4.<br />
Sweat Shirts & Tee-Shirts: Stock of these is now almost all gone - please<br />
contact Robert Mahoney regarding remaining stock, sizes and prices.<br />
PLEASE REMIT IN STERLING ONLY,<br />
WITH ALL CHEQUES MADE PAYABLE TO B.E.F.A.<br />
Advertisers Index<br />
BEFA Sales................................................................. 70<br />
Fanfare.............................................. Inside Back Cover<br />
For Sale / Wanted ....................................................... 67<br />
Hyperflight.co.uk ........................................................ 19<br />
New-2-U ............................................................... 6 to 12<br />
RC Groups / E-Zone ......................... Inside Front Cover<br />
Traplet ............................................Outside Back Cover<br />
EF-UK advertising rates are £25 per inside or outside cover page,<br />
£20 per full page, £10 per half page, all per issue.<br />
Contact the EF-UK Editor for more details (see page 4).
FANS<br />
Morley ‘Jet Elec’ Fan .............................. £15.00<br />
WeMoTec Micro-Fan (280/300/330) ..... £14.00<br />
WeMoTec Mini-Fan (400/480) ............... £28.00<br />
WeMoTec Midi-Fan (540/ 600/930) ....... £38.00<br />
MOTORS<br />
MPJet Brushless motors; 9 motors; outrunners,<br />
inrunners & geared; 280 to 700 .... £37.00 to £58.00<br />
WEP Turbo 10 ....................................... £55.00<br />
Fanfare Silver 16T & 20T ...................... £34.00<br />
Fanfare Powermax 40T ........................ £38.00<br />
Speed 600 8.4v BB SP .......................... £17.00<br />
Speed 600 8.4v Race ............................ £22.00<br />
RE 380 / Rocket 400 ................................ £5.00<br />
Speed 480 BB ........................................ £21.00<br />
Pro 400 .................................................... £5.00<br />
Pro 480 HS ............................................... £6.00<br />
Pro 480 HS BB ......................................... £8.00<br />
MAXCIM BRUSHLESS<br />
Max Neo 13Y 1430 rpm/v ................... £160.00<br />
Max Neo 13D 2470 rpm/v .................... £160.00<br />
Maxu 35D, 21 Cell Controller ............... £140.00<br />
Maxu 35C, 25 Cell Controller ............... £180.00<br />
Superbox 1.6 to 4.28:1 ......................... £50.00<br />
Monsterbox 4 to 6.8:1 .......................... £60.00<br />
Motor Mount ........................................... £12.00<br />
CHARGERS<br />
Speed 1 Pulse / Pk<br />
Det 4-8 cells ........................................... £27.00<br />
Speed Ex Digital<br />
as above with discharge ...................... £55.00<br />
Simprop 25 cell .................................... £100.00<br />
Wheels, Wire, Servos, Fuses, Caps,<br />
Powerpole, 4mm & 2mm gold conns.<br />
– MAIL ORDER –<br />
SPORTS <strong>ELECTRIC</strong> <strong>FLIGHT</strong><br />
FANS AND GEARBOXES<br />
www.fanfare.f9.co.uk<br />
GEARBOXES<br />
Master Airscrew - 2.5, 3, 3.5:1 ............................. £18.00<br />
MP Jet Planetary - 3.33 & 3.8:1 - 400 / Pro 480 ...... £28.00<br />
MP Jet Planetary - 3.33 & 3.8:1 - Speed 480 ........ £28.00<br />
MP Jet Planetary - 3.33 & 3.8:1 - 540 / 600 ............ £28.00<br />
MP Jet Plastic BB - 4 & 5:1 - 280 / 300 ...................... £8.00<br />
MP Jet Plastic BB - 3, 3.5 & 4:1 - 400 / Pro 480 ......... £8.00<br />
MP Jet Plastic BB - 2.33, 3.5 & 4:1 - Speed 480 ..... £10.00<br />
MP Jet Plastic BB - 1.75, 2.33 & 2.8:1 - 540 / 600 .. £15.00<br />
Mini Olympus ............................................ £8.00<br />
Olympus ................................................. £12.00<br />
MOTORS / GEARBOXES<br />
Speed 400 FG3 ..................................... £17.00<br />
SpeedGear 400 4:1 Inline ...................... £38.00<br />
SpeedGear 480 3.45:1 .......................... £55.00<br />
SpeedGear 600 2.8:1 ............................ £52.00<br />
SpeedGear 700 2.7:1 9.6v .................... £70.00<br />
SpeedGear 700 Neo .............................. £92.00<br />
Mini-Olympus & RE380 .......................... £12.00<br />
Olympus & 540 ...................................... £19.00<br />
Jamara 600 2.9:1 ................................... £24.00<br />
Jamara 650 2.9:1 ................................... £26.00<br />
PROPS<br />
M.A. Folding 12x8 ................ £14.00<br />
15x12 .............. £15.25<br />
M.A. Wood <strong>Electric</strong> 10x6/10x8 ......... £4.00<br />
11x7/11x9 ......... £4.25<br />
12x8/12x10 ....... £4.50<br />
13x8/13x10 ....... £5.00<br />
Carbon Folders 7x4 .................... £6.00<br />
(Perkins) 8x4 .................... £6.00<br />
11x8 .................. £9.00<br />
Slimprops 8x4, 8x6, 9x6 .... £3.50<br />
APC <strong>Electric</strong> 5½” - 12” dia . £3 to £4<br />
(full range available) 13 ” - 20” dia.£5 to £15<br />
Selection of Graupner & Aeronaut<br />
folding & fixed props.<br />
FANFARE • 18 HILLSIDE ROAD • TANKERTON • WHITSTABLE • KENT • CT5 3EX<br />
‘Sports <strong>Electric</strong>’ Helpline - Phone / Fax: (01227) 771331 - E-mail: john.swain1@virgin.net<br />
Now online at - www.fanfare.f9.co.uk