Enhancing Worker Digital Experience: A Hands-on Workshop for Partners
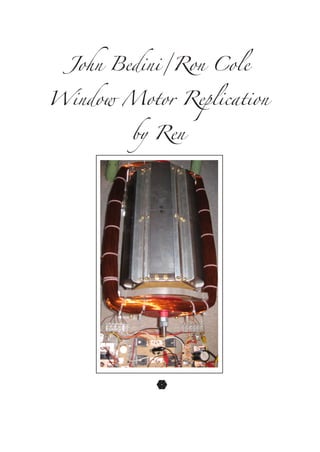
Bedini window motor tutorial
1.
2. The article following is a brief account of my construction
and testing of the Bedini/Cole window motor. It is a work in
progress and thus may change over time. I assume that the
reader is already familar with Johns schematics and work
and understands basic principles of an oscillating circuit. All
of the circuits are patented by John Bedini.
3. Tapered nut/fitting for bearings
Mild steel plate. 320mm x 65mm
6 plates in total (one for each side)
Holes drilled for fixing to plywood hexagonal
prism. Thickness can vary from 2-5mm thick
Plyood Hex x 2 (top and bottom)
at least 15mm thick
All holes around circumference are for
prism supports, Center hole is for shaft
65mm
Hex side variable from 60-70mm
according to steel available
Stainless steel shaft (or other non magnetic
material) to hold up to 20 kilograms of weight
Ends threaded for attachment of
pulleys/gears etc.
65mm
320mm
12mm
320mm
I began construction on the rotor after selecting my
magnets. I had opted for 12 magnets of 6inch x 2inch x 1
inch and I decided to try a rotor which took advantage of the
surface area when the magnets were stacked side by side.
Thus my rotor was now 12 inches long. It was near
impossible to find off the shelf hexagonal prisms of that
dimension so I constructed one from scratch. Here are the
documents I drew up in reference to its design.
4. Construction was fairly straight forward once I had all
of the pieces. I used a spirit level to ensure accuracy and brass
screws to attach all of the steel plates. Little “L” angled
aluminum I found also fit nicely on the plates with the magnets
sandwitched between.
The hexagons had nuts on either side of them and they
were all tightened before plate assembly. The shaft is 12mm
threaded stainless.
5. Here is the 1 to 1 template I used to cut out my supports
and align the coil. The holes near the magnets are for a
temporary frame (wood) in which to wrap the window coil.
6. The uprights and base are all made of acrylic and bearings
are press fit into but not through. Shaft extends out on both
ends.
Particular care must be taken in alignment and snugness.
I found it necessary to make some spacers and tighten a nut
on both sides. Then again this rotor weighs 20 kilos, perhaps
smaller ones wont be so bad.
It wasnt perfectly balanced when finally assembled so
I went to an Auto/tyre outlet and asked for some lead weights
that are commonly used to balance car/bike tyres. They gave
me a whole box of seconds (pre used and removed) for free.
Balancing is a little trickey but well worth the effort.
Especially if high speed is wanted safely!
7. Full credit to JB/RC and Rick Friedrich for the above
schematic. I basically used this circuit with a few other tweaks
for easier tuning, most of which are listed above already.
For those who need a visual reference the changes I
made are drawn below.
The potentiometers were chosen over a fixed resistor
simply for ease of testing. I will replace them with fixed
resistors once the ideal setting has been established.
The circuit will start the rotor alot faster if the resistance
is low on the 220ohm off the base of the PNP and the trigger
coil if used. Too low resistance on the trigger coil can cause
dramas, stick to at least 100 ohms to start with. The rest of
the resistance figures above should start almost all
configurations, and can be varied to suit your purposes.
8. If you are having trouble coming to grips with the circuit
firsh build the half circuit. Once you can get it to run it is as
simple as building another half circuit and inverting it over
the drive coil. Remember the trigger needs to have its polarity
flipped for for this second circuit.
I cut up some copper coated epoxy board to make little
mounting tabs for everything. Here is a close up of the circuit
once completed. Its a little messy at the moment because I
am still testing various configurations.
1k pots, trigger coil
110ohms resistor.
1k pots, trigger coil
110ohms resistor.
3 windings in series
through bridge for 40vdc
when connected to negative
of run battery @ 12v
270 uF
450v
T2 P1
Unused
G 1/2/3
T1
P1
T1
T2
I used 3 amp Bridge
4 x 1n5408
Everything increases (except amp draw) when you wire more
power windings in parallel. I now have all five power windings
connected together @ the collectors and rpm/torque/charging
have all dramatically increased. Amp draw remains the same
or even less @ some levels of tune.
Remember, the faster this thing goes, the faster it switches
hence the less it draws.
10. The windings are 7 filar @ approx 200m each. Two
windings of 0.53 (SWG 25) and five windings of 0.90 (SWG
20). I measured out all of them separately and spooled them
up onto separate spools.
The window motor was then placed on at temporary
turntable and all windings were wound at once, splitting
around the shaft.
In hindsight this probably wasnt the best choice because
it hinders any removal of the rotor. I will have to unwind the
coil if that needs to be done.
Recent data shows that it should be possible to wind
the window coils and position them around the circumference
of the rotor. This would make things alot easier, especially
for multicoils!
11. Tuning is varible depending on what you want out of it. If it
is primarily for torque and is designed as such then a high voltage
of medium amp draw should offer some good results.
It should be able to go to 50 volts with the schematic provided,
the MPSA06 is rated for 80v. Heat sinks are a good idea for anything
over 12 v. Resistors may need to be of higher wattage, depending
on amp draw.
In closing Id like to thank various indivduals, Adrian B, Luke
M, Steve G, Rick F, John K, Ash P, and all the folks at the Monopole
Forums and Energetic Forums for their combined efforts.
And of course a very big thankyou to John Bedini.
Shanan Reynaud
The author may change the information contained
here, but all circuitry is copyrighted by John Bedini
and this document is copyrighted by myself. Please
advise me if you wish to host or distribute this
document and dont make any changes without first
consulting me.
*28/11/2008*
**Part 2 of this build/document is currently under
construction pending funds. The whole thing is
being reconstructed from the ground up in a slightly
different configuration to the one seen here.
Advanced circuit configurations to follow**